Windows OS Hub
  • Windows Server
    • Windows Server 2022
    • Windows Server 2019
    • Windows Server 2016
    • Windows Server 2012 R2
    • Windows Server 2008 R2
    • SCCM
  • Active Directory
    • Active Directory Domain Services (AD DS)
    • Group Policies
  • Windows Clients
    • Windows 11
    • Windows 10
    • Windows 8
    • Windows 7
    • Windows XP
    • MS Office
    • Outlook
  • Virtualization
    • VMWare
    • Hyper-V
    • KVM
  • PowerShell
  • Exchange
  • Cloud
    • Azure
    • Microsoft 365
    • Office 365
  • Linux
    • CentOS
    • RHEL
    • Ubuntu
  • Home
  • About

Windows OS Hub

  • Windows Server
    • Windows Server 2022
    • Windows Server 2019
    • Windows Server 2016
    • Windows Server 2012 R2
    • Windows Server 2008 R2
    • SCCM
  • Active Directory
    • Active Directory Domain Services (AD DS)
    • Group Policies
  • Windows Clients
    • Windows 11
    • Windows 10
    • Windows 8
    • Windows 7
    • Windows XP
    • MS Office
    • Outlook
  • Virtualization
    • VMWare
    • Hyper-V
    • KVM
  • PowerShell
  • Exchange
  • Cloud
    • Azure
    • Microsoft 365
    • Office 365
  • Linux
    • CentOS
    • RHEL
    • Ubuntu

 Windows OS Hub / Virtualization / VMWare / Configuring iSCSI Datastore (LUN) on VMware ESXi

September 15, 2022 VirtualizationVMWare

Configuring iSCSI Datastore (LUN) on VMware ESXi

In VMware vSphere, you can use an iSCSI disk as a shared datastore for your ESXi hosts. An ESXi host accesses iSCSI storage over your local network using the TCP protocol. In this article, we’ll look at how to add an iSCSI LUN to a VMWare ESXi host and create a shared VMFS datastore on it.

Contents:
  • Configure Network for iSCSI Traffic on VMWare ESXi
  • Configuring iSCSI Software on VMWare ESXi
  • Create a VMFS Datastore on iSCSI LUN in VMWare ESXi

Suppose you have already created, configured, and published an iSCSI target (disk) on your storage device (array). Also, you can use a virtual disk (VHDX) hosted on Windows Server as an iSCSI target.

Make sure you allowed your ESXi hosts (iSCSI initiators) to connect to the iSCSI target in your storage configuration. You can address the iSCSI target using an IQN (how to get IQN of an iSCSI adapter in ESXi is shown below), DNS name, IP, or MAC address.

In this example, we are using a standalone host running VMware ESXi 6.7 (you can also use the free ESXi Hypervisor). This can be a physical host or a virtual machine (here is an example of running ESXi in a Hyper-V VM). There are two network interfaces in the host (the first is for management and the second is for the iSCSI traffic).

Configure Network for iSCSI Traffic on VMWare ESXi

Open the web interface to manage your ESXi host (_https://YOUR_ESXI_HOST/ui/#/login).

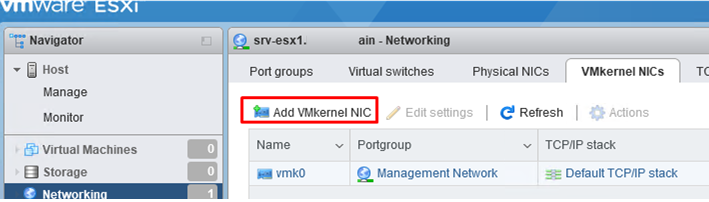
First of all, create a separate VMkernel network interface that will be used by the ESXi host to access the iSCSI storage. Open Networking -> VMkernel NICs -> Add VMkernel NIC.

add vmkernel nic on vmware esxi

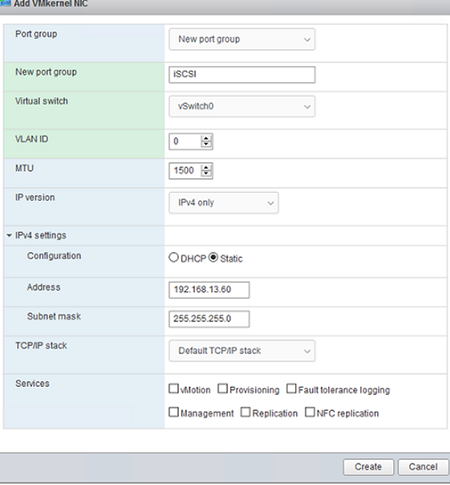
Besides the vmk port, create a new port group (New port group). Specify the group name (iSCSI) and assign a static IP address for your vmkernel interface.

set static ip address for iscsi vmkernel port on esxi

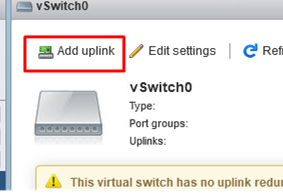
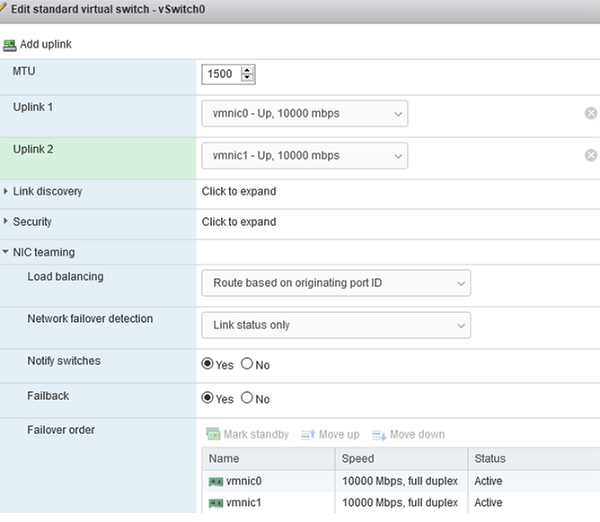
Then open the settings of your default vSwitch0 (Networking -> Virtual Switches). Make sure that the second physical interface (vmnic1) of your host has been added to the configuration and is active (otherwise, click Add uplink to add it).

add uplink to vmware switch

In the NIC Teaming section, make sure that both physical interfaces are Active.

virtual switch settings

Then in the iSCSI port group settings, you need to allow only the second interface to be used for iSCSI traffic. Go to Networking -> Port groups -> iSCSI —> Edit settings. Expand the NIC teaming section and select Override failover order = Yes. Leave vmnic1 active and set Unused for the vmnic0 port.

link vmkernel to uplink

As a result, your ESXi host will use only one network interface to access your iSCSI LUN.

Configuring iSCSI Software on VMWare ESXi

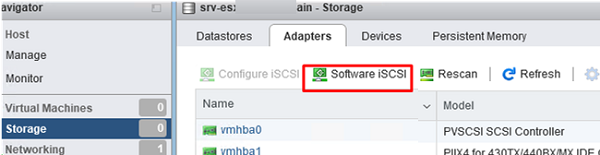
The iSCSI software adapter is disabled by default in ESXi. To enable it, open Storage -> Adapters. Click Software iSCSi.

configure software iscsi on vmware esxi

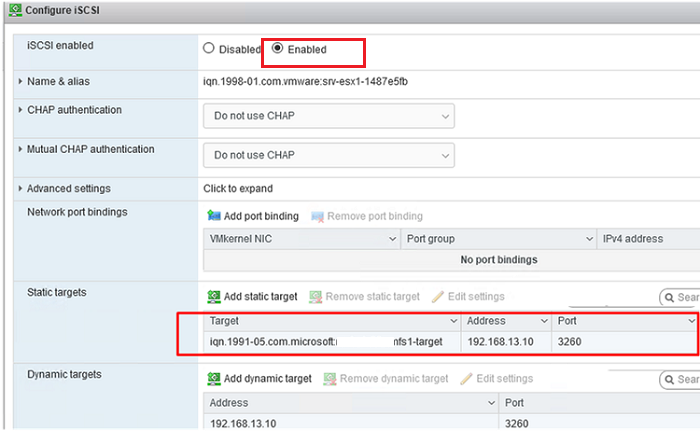
Change iSCSI enable to Enabled.

Note that here you can get the IQN of your iSCSI adapter (initiator). You can use it to configure access to your iSCSI LUN in the storage array settings.

Then add the IP address of your iSCSI storage and the connection port (by default, the TCP Port 3260 is used for the iSCSI traffic) in the Dynamic targets section. ESXi will scan all iSCSI targets on the storage and display them in the Static Targets list.

enable software iscsi and ser target ip address on esxi

Here you can configure CHAP authentication, but it is optional in the test environment.

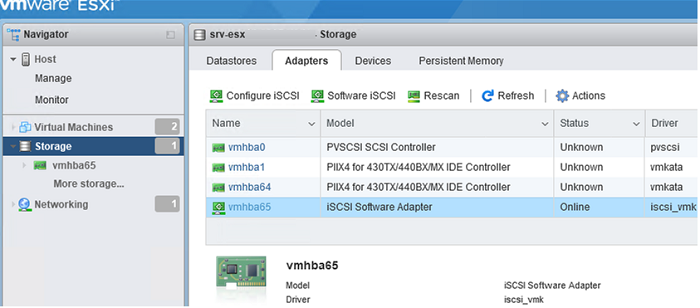
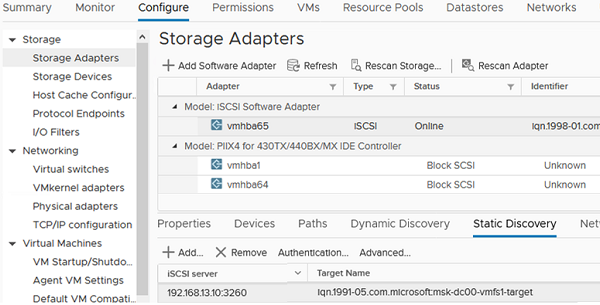
Save the settings. Note that a new iSCSI Software Adapter HBA vmhba65 appeared in the Storage -> Adapters tab.

vmhba65 software iscsi adapter

If your ESXi host is connected to vCenter, open Configure -> Storage –> Storage Adapters to add an iSCSI LUN. Select Software iSCSI adapter and specify the name or the IP address of your iSCSI storage in the Dynamic Discovery tab. Click Rescan. A list of available iSCSI targets will appear in the Static Discovery tab.

configure Static Discovery of iscsi targets on vmware vsphere

If you don’t see the list of iSCSI targets in your storage, you can diagnose iSCSI disk availability using the ESXi console.

Enable SSH on your ESXi host and connect to it using any SSH client (I use the built-in Windows 10 SSH client):

ssh [email protected]

Using the command below, you can check the availability of your iSCSI storage (192.168.113.10) from the specified vmkernel port (vmk1):

# vmkping -I vmk1 192.168.113.10

vmkping - check iscsi target

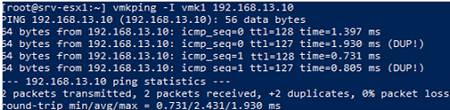
In this example, the iSCSI storage responds to ping.

Then check if the iSCSI TCP Port 3260 is available on the storage using netcat (in this example, 192.168.113.60 is the IP address of the vmk1 interface):

# nc -s 192.168.113.60 -z 192.168.113.10 3260

Connection to 192.168.113.10 3260 port [tcp/*] succeeded!

nc - check for iscsi open port 3260 on storage device

Make sure that the software iSCSI is enabled on your ESXi host:

# esxcli iscsi software get

true

Enable it if needed:

# esxcli iscsi software set -e true

Software iSCSI Enabled

You can also get the current settings of a software iSCSI HBA adapter as follows:

# esxcli iscsi adapter get -A vmhba65

esxcli iscsi adapter get info

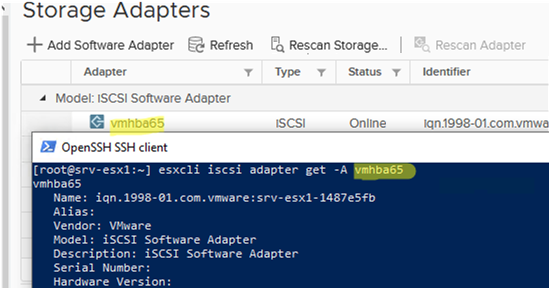
vmhba65
Name: iqn.1998-01.com.vmware:srv-esx1-1234abcd
Alias:
Vendor: VMware
Model: iSCSI Software Adapter
Description: iSCSI Software Adapter
Serial Number:
Hardware Version:
Asic Version:
Firmware Version:
Option Rom Version:
Driver Name: iscsi_vmk
Driver Version:
TCP Protocol Supported: false
Bidirectional Transfers Supported: false
Maximum Cdb Length: 64
Can Be NIC: false
Is NIC: false
Is Initiator: true
Is Target: false
Using TCP Offload Engine: false
Using ISCSI Offload Engine: false

Create a VMFS Datastore on iSCSI LUN in VMWare ESXi

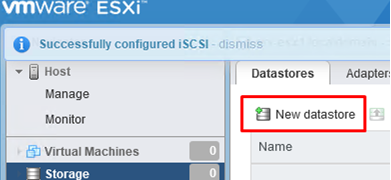
Then you can create a VMFS (Virtual Machine File System) datastore to store virtual machine files on the connected iSCSI LUN.

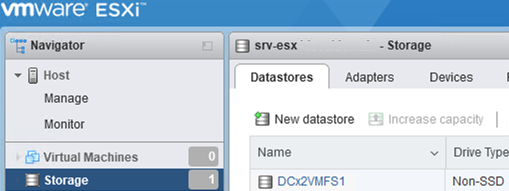
Open Storage -> Datastores -> New datastore.

create new datastore on esxi host

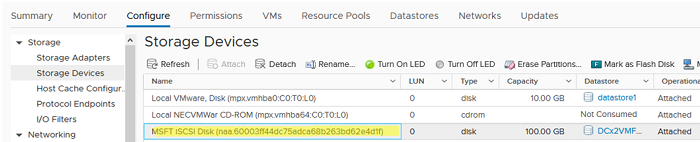
Enter the name of your VMFS datastore and select the iSCSI LUN to create it.

create vmfs datastore on iscsi lun

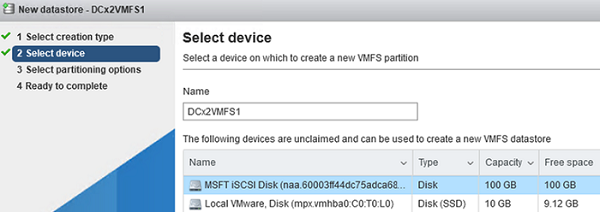
Select VMFS 6 as a file system and specify that you want to entire the volume of the iSCSI disk for the datastore. In a few seconds, your new VMFS datastore will be available on ESXi.

new datastore on vmware esxi host

If the VMFS datastore has already been created on this LUN, it will immediately appear in the list of available Storage Devices on your host.

iscsi storage device on esxi

So, you have connected the iSCSI disk to your ESXi host and created a VMFS datastore on it. Multiple ESXi servers can simultaneously access this datastore. Now you have shared storage, and if you configure a VMware vCenter server, you will be able to use vMotion to move running VMs between hosts.

1 comment
3
Facebook Twitter Google + Pinterest
previous post
KMS Activation of Windows Server 2022 and 2019
next post
How to Disable Automatic Driver Updates on Windows 10/11?

Related Reading

Reset Root Password in VMware ESXi

October 12, 2023

How to Fix ‘An Operating System Wasn’t Found’...

July 14, 2023

Unmounting an NFS Datastore from VMware ESXi

April 21, 2023

How to Increase Virtual Machine Disk Size in...

April 6, 2023

How to Install Free VMware Hypervisor (ESXi)

January 24, 2023

1 comment

Cisse mory moussa September 14, 2022 - 6:47 pm

Hi , very good course. Can i get pdf courses about vmware vsphere and storage ?

Reply

Leave a Comment Cancel Reply

Categories

  • Active Directory
  • Group Policies
  • Exchange Server
  • Microsoft 365
  • Azure
  • Windows 11
  • Windows 10
  • Windows Server 2022
  • Windows Server 2019
  • Windows Server 2016
  • PowerShell
  • VMWare
  • Hyper-V
  • Linux
  • MS Office

Recent Posts

  • How to Connect VPN Before Windows Logon

    November 14, 2023
  • Removing Azure Arc Setup Feature on Windows Server 2022

    November 9, 2023
  • Using WPAD (Web Proxy Auto-Discovery Protocol) on Windows

    November 7, 2023
  • Send Emails with Microsoft Graph API and PowerShell

    November 6, 2023
  • Zabbix: How to Get Data from PowerShell Scripts

    October 27, 2023
  • Tracking Printer Usage with Windows Event Viewer Logs

    October 19, 2023
  • PowerShell: Configure Certificate-Based Authentication for Exchange Online (Azure)

    October 15, 2023
  • Reset Root Password in VMware ESXi

    October 12, 2023
  • How to Query and Change Teams User Presence Status with PowerShell

    October 8, 2023
  • How to Increase Size of Disk Partition in Ubuntu

    October 5, 2023

Follow us

  • Facebook
  • Twitter
  • Telegram
Popular Posts
  • Adding Drivers into VMWare ESXi Installation Image
  • Shrinking VMDK Virtual Disk Size on VMWare ESXi
  • How to Access VMFS Datastore from Linux, Windows, or ESXi
  • Hyper-V Virtual Machine Stuck in Stopping/Starting State
  • Recovering a Deleted VMFS Datastore on VMware ESXi/vSphere
  • Match Windows Disks to VMWare VMDK Files
  • How to Install Windows 11 on a Hyper-V Virtual Machine
Footer Logo

@2014 - 2023 - Windows OS Hub. All about operating systems for sysadmins


Back To Top