I wanted to install a VMWare ESXi in a Hyper-V virtual machine running on Windows 10 for my homelab stand. Hyper-V and VMWare ESXi support nested virtualization so this scenario is possible (though it is not supported officially). However, there are some aspects of ESXi installation on Hyper-V to be noted.
There are no drivers for Hyper-V virtual network adapters in the ESXi image, and this NIC is not supported by VMware (it is not included in the VMware Hardware Compatibility List — HCL). So prior to installing the VMWare ESXi on a virtual machine, you need to slipstream the driver for Hyper-V network adapter (net-tulip) into the ESXi installation image.
If the ESXi installer does not find any network adapters, it returns the following error and prevents you from going on with the installation:
No Network Adapters.
No network adapters were detected. Either no network adapters are physically connected to the system, or a suitable driver could not be located. A third-party driver may be required.

To add the net-tulip driver to your ESXi image, install the VMWare PowerCLI module on your computer.
You can add net-tulip to the image using PowerShell cmdlets from VMware.ImageBuilder module (Add-EsxSoftwareDepot, Add-EsxSoftwarePackage, Export-EsxImageProfile). In this case, you will have to download the ESXi image and the net-tulip driver manually (http://vibsdepot.v-front.de/depot/bundles/net-tulip-1.1.15-1-offline_bundle.zip).
The easiest method is to use a ready ESXi-Customizer-PS module (we discussed earlier in the article on how to inject drivers into an ESXi image).
You can download the latest version of the ESXi-Customizer-PS 2.8.1 module from GitHub ( https://github.com/VFrontDe/ESXi-Customizer-PS/blob/master/ESXi-Customizer-PS.ps1). This script version supports current VMWare ESXi 7.0 and 6.7 versions.
Display the list of ESXi versions available for download:
.\ESXi-Customizer-PS-v2.8.1.ps1 -sip –ozip
In our case, download the image with the number 203 (ESXi-6.0.0-20170604001-standard). Enter 203 and press Enter.

ESXi-6.0.0-20170604001 Build 5572656. In spite of the fact that ESXi-Customizer-PS 2.8.1 allows to work with ESXi 7.0 image and integrate Net-tulip network driver into it, the installer does not load the driver and does not see the Hyper-V virtual network adapter.Wait till the script downloads a ZIP file with the ESXi image to the current directory.
To integrate the net-tulip to the ZIP image and get an ISO image, run the command below:
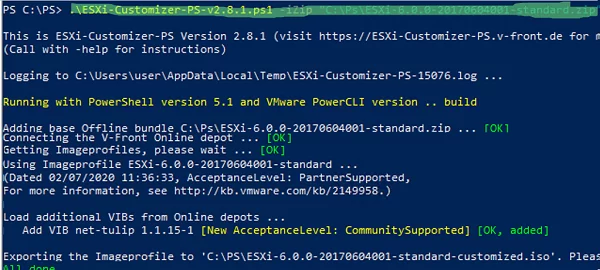
.\ESXi-Customizer-PS-v2.8.1.ps1 -iZip "C:\Ps\ESXi-6.0.0-20170604001-standard.zip" -vft -load net-tulip
This is ESXi-Customizer-PS Version 2.8.1 (visit https://ESXi-Customizer-PS.v-front.de for more information!)
(Call with -help for instructions)
Logging to C:\Users\user\AppData\Local\Temp\ESXi-Customizer-PS-15076.log ...
Running with PowerShell version 5.1 and VMware PowerCLI version .. build
Adding base Offline bundle C:\Ps\ESXi-6.0.0-20170604001-standard.zip ... [OK]
Connecting the V-Front Online depot ... [OK]
Getting Imageprofiles, please wait ... [OK]
Using Imageprofile ESXi-6.0.0-20170604001-standard ...
(Dated 02/07/2020 11:36:33, AcceptanceLevel: PartnerSupported,
For more information, see http://kb.vmware.com/kb/2149958.)
Load additional VIBs from Online depots ...
Add VIB net-tulip 1.1.15-1 [New AcceptanceLevel: CommunitySupported] [OK, added]
Exporting the Imageprofile to 'C:\PS\ESXi-6.0.0-20170604001-standard-customized.iso'. Please be patient ...
All done.
-vft option means that the latest VIB driver must be downloaded from the V-Front online repository.So, you have an installation ESXi ISO image. Then create a new virtual machine on your Hyper-V host. Use the following settings for Hyper-V VM:
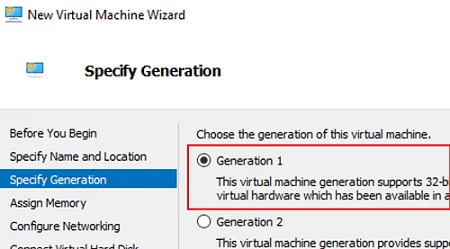
- Create a Generation 1 VM;

- Add at least 2 vCPUs for your VM;
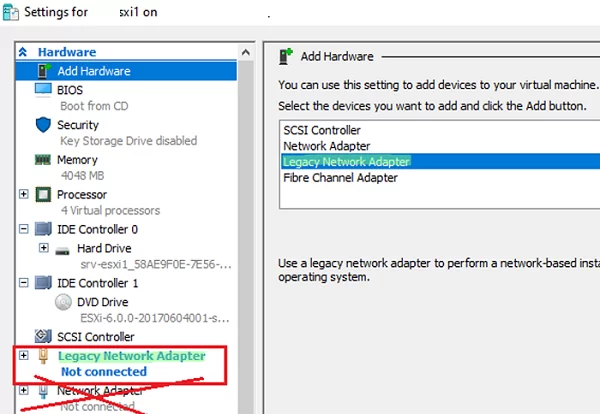
- Remove the default Network Adapter in the VM properties and add a new Legacy Network Adapter;
- Allow using Nested virtualization feature for the VM:
Set-VMProcessor -VMName test-esxi1 -ExposeVirtualizationExtensions $true - Mount your ESXi ISO image to your VM.
If you try to boot a virtual machine from your ESXi install image, an error of a video adapter incompatible with VMkernel appears:
Shutting down firmware services…
Relocating modules and starting up the kernel…

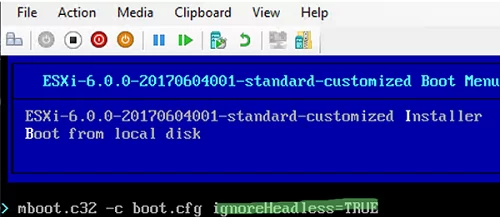
To ignore the problem and continue ESXi installation, press TAB when booting the VM and add the following option:
ignoreHeadless=TRUE
The ESXi installer will check the hardware configuration, detect a network card and offer to continue ESXi image installation on a virtual disk.
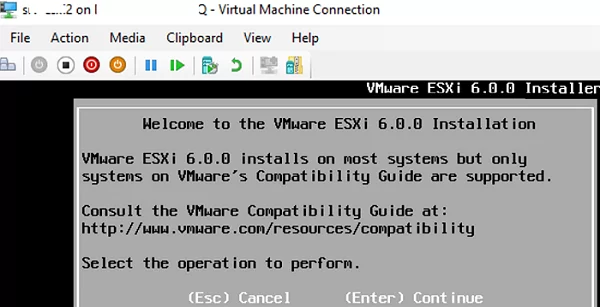
Then follow the prompts of the VMWare ESXi installation wizard (the steps are described in detail in the article How to Install and Configure VMWare Hypervisor?).
After the installation is over, restart your VM and press Shift+O when selecting ESXi boot options. Also, specify that ESXi must boot without a videocard check. To do it, type ignoreHeadless=TRUE at the end of the line and press Enter.

To avoid doing it each time when you boot the VM, change your ESXi configuration:
- After booting ESXi, press F2 and enter the root password;
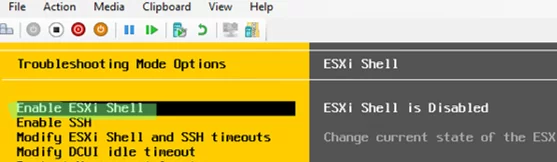
- Select Troubleshooting Options -> Enable ESXi Shell in DCUI ESXi;
- To open the ESXi console, press Alt+F2;
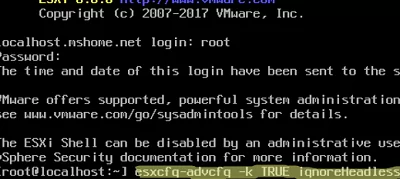
- Run the following command in the console prompt:
Esxcfg-advcfg -k TRUE ignoreHeadless
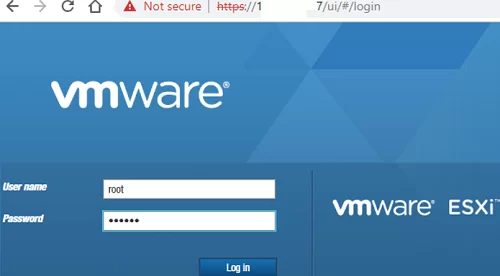
Close the console by pressing ALT+F2. Then configure network settings for ESXi host in DCUI and restart the VM. Make sure that ESXi can boot correctly and you can connect to it using vSphere Web Client.
So, we have shown how to run ESXi in a Hyper-V virtual machine. However, the configuration is not officially supported, but it will help you to work with earlier VMWare ESXi versions in a sandbox on your home computer running Windows 10.
2 comments
Just a reminder that it’s necessary to enable “MAC address spoofing” on Legacy network adapter to allow nested VM traffic.
Also, for some reason VMware will not be reachable (ICMP, HTTP) from the Hyper-V host directly, only from other hosts.
Every time we restart the nested ESXi 6.0 VM the root password is again blank and the ignoreheadless config is gone. We have built several custom images ESXi-6.0.0-20170604001-standard-customized.iso thinking something was wrong with the images created previously but the same symptoms. We can ping the gateway from the ESXi 6.0 VM but we cannot ping the ESXi 6.0 VM, nor can we SSH to it or use the vsphere client to connect to it. If we set a static IP for this nested ESXi 6.0 guest VM, after a reboot it goes back to DHCP. Maybe VMWARE blacklisted the net tulip drivers on this 20170504001 build too. So maybe we will have to use an older .ISO verson and customize it. Not sure how to proceed now.