iSCSI (Internet Small Computer System) is an SCSI protocol that allows to access storage devices over the IP protocol. Using iSCSI, you can connect your server to a shared network storage over a common TCP/IP network without using Fiber Channel (FC). In this article we’ll show how to configure an iSCSI target (virtual disk) on a server running Windows Server 2019 and connect this iSCSI LUN on other servers (in Windows Server 2016 and 2012 R2 it is configured in the same way). The first example of iSCSI usage: a file server needs more storage space, and we connect a virtual disk from another storage server over iSCSI. Another example is building of a failover cluster, when multiple servers need to access a shared storage.
To use an iSCSI disk, you must configure a virtual disk (it is a common VHD/VHDX file) on a storage server and publish it as an iSCSI target, which iSCSI initiators (other servers or devices) connect to.
Configuring an iSCSI Target on Windows Server
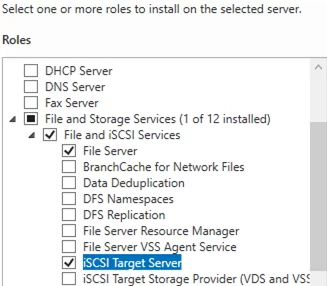
First of all, open the Server Manager and enable the iSCSI Target Server role in File and Storage Services -> File and iSCSI Services.
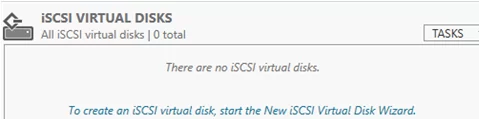
Then create a virtual disk on your iSCSI server. To do it, go to Server Manager -> File and Storage Services -> iSCSI and click To create an iSCSI virtual disk, start the New iSCSI Virtual Disk Wizard.
In the iSCSI virtual disk wizard, select a physical partition to place the virtual disk file. Then assign a name to the new iSCSI disk, set its size, type (Fixed Size, Dynamically expanding or Differencing) and the iSCSI target name.
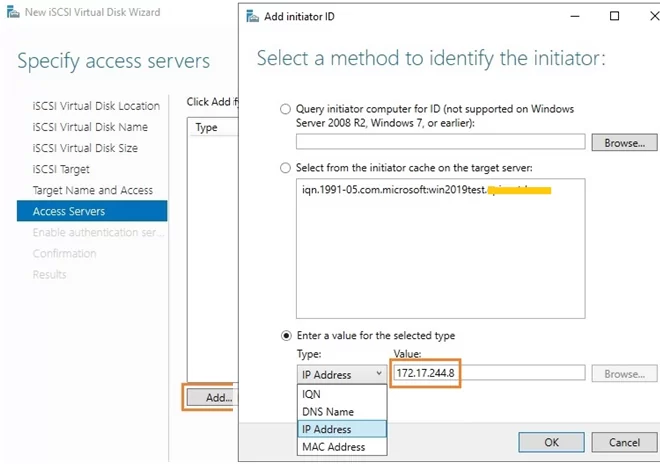
At the Access Servers step, specify the servers (iSCSI initiators) that will be able to connect to the iSCSI target by selecting one of the following connection options:
- IQN (you will have to enable iSCSI initiator on your server first and copy its IQN);
- DNS Name;
- IP Address;
- MAC Address.
Let’s use the IP address option.
The next step in the wizard is to configure CHAP authentication protocol. It must be used if you want to authenticate the initiator’s connection. Enable it, enter a user name and a 12-character password (or a longer one) and click Next -> Next -> Finish. Make sure that iscsiDisk2.vhdx has been created in D:\iSCSIVirtualDisks folder.
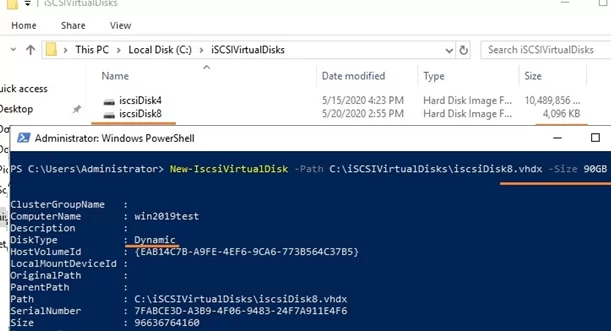
You can create an iSCSI disk using PowerShell. Let’s create a 200 GB virtual disk:
New-IscsiVirtualDisk -Path c:\iSCSIVirtualDisks\iscsiDisk2.vhdx -Size 200GB
By default, a 4,096 KB dynamic disk is created independent of the value specified in the Size parameter. The dynamic disk will grow as needed.
If you want to use a fixed-sized disk (such disks reserve space on a physical drive when creating them), you can create it using the same command with the UseFixed parameter:
New-IscsiVirtualDisk -Path c:\iSCSIVirtualDisks\iscsiDisk2.vhdx -Size 200GB –UseFixed
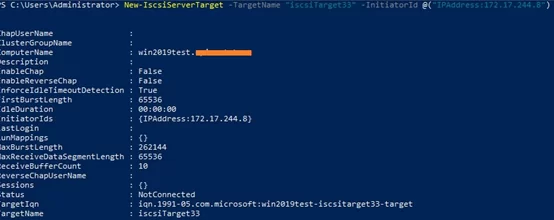
Then assign a name to the target. At this step you can allow access to it from the initiator server IP address:
New-IscsiServerTarget -TargetName "iscsiTarget33" -InitiatorId @("IPAddress:172.17.244.8")
If you want, you can use an IQN name (iSCSI Qualified Name – a unique iSCSI device ID in the network) instead of the IP address:
New-IscsiServerTarget -TargetName iscsiTarget33 -InitiatorIds “IQN:1991-05.com.microsoft:win2019test.ddd.com”
Then it is recommended to check the result:
Get-IscsiServerTarget | fl TargetName, LunMappings

You can get a full target name using the Get-IscsiTarget cmdlet, and then connect the target:
Connect-IscsiTarget -NodeAddress iqn.1991-05.com.microsoft:win2019test-iscsitarget33-target

Install and Configure iSCSI Initiator on Windows Server
The next step is to connect to the virtual iSCSI disk you created from the second (initiator) server. Open the Control Panel and start the iSCSI initiator (or run iscsicpl.exe).
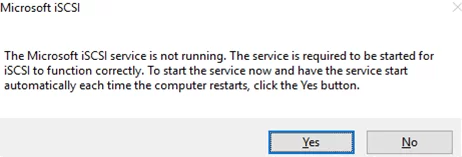
In the Service Management console (services.msc), set the automatic startup type for Microsoft iSCSI Initiator Service or use this command:
Set-Service -Name MSiSCSI -StartupType Automatic
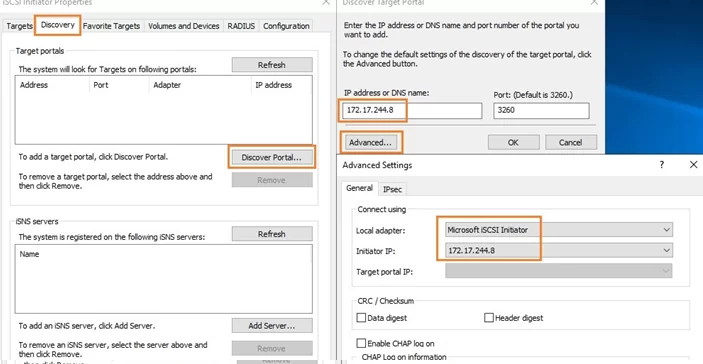
Go to the Discovery tab, click Discover Portal and enter the IP address of the first server (the iSCSI target). In order to route storage traffic through the specific network interface, click Advanced and change the default values in the dropdown lists to the following ones: Local Adapter –> Microsoft iSCSI Initiator, Initiator IP –> 172.17.244.8.
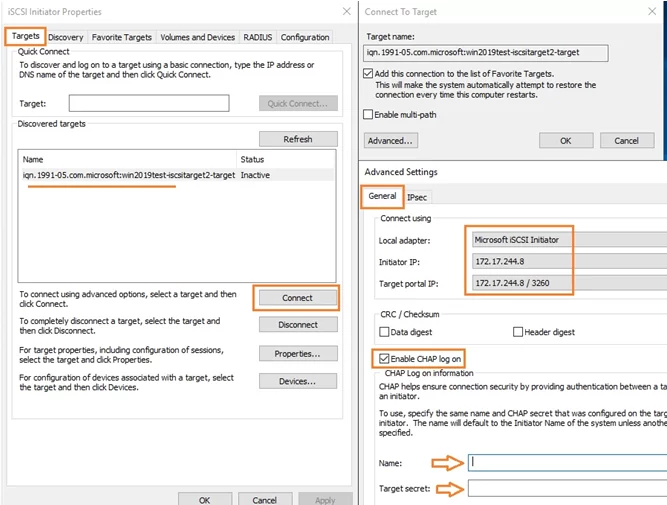
Then go to the Targets tab and you will see a new connection there. To enable it, click Connect -> Advanced, select the values you want in the dropdown lists, check Enable CHAP log on and enter the user name and the 12-character password.
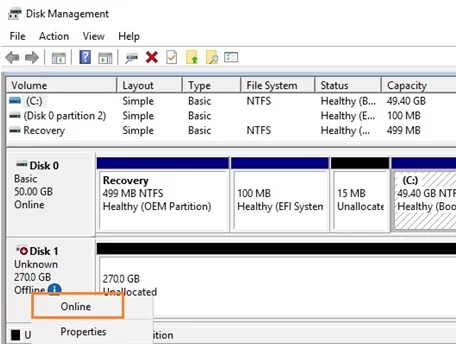
Then initialize the iSCSI disk, which is initially in the Offline state. To do it, select Online, and then Initialize Disk in the context menu of the new disk in the Disk Management console. Create one or more partitions on the new disk and assign a drive letters and labels to them. Format the volumes to NTFS.
To quickly initialize and format your new disk, you can use the following PowerShell one-liner (see an example in the article on disk and partition management with PowerShell):
Get-Disk |Where-Object PartitionStyle -eq 'RAW' |Initialize-Disk -PartitionStyle MBR -PassThru |New-Partition -AssignDriveLetter -UseMaximumSize |Format-Volume -FileSystem NTFS -Confirm:$false
Now you can use the virtual disk connected over iSCSI from another server as a common local drive.
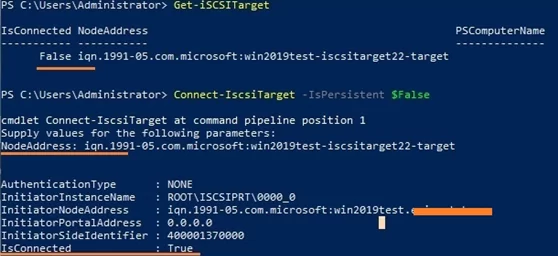
You can also connect an iSCSI disk on the initiator host with PowerShell. To get the target IQN, use the Get-iSCSITarget cmdlet.
To connect to the iSCSI target, run this command:
Connect-IscsiTarget –IsPersistent $False and enter the IQN.
If using additional CHAP authentication, provide authentication credentials using the following command:
Get-iScsiTarget | Connect-iScsitarget –AuthenticationType ONEWAYCHAP –ChapUserName <username> -ChapSecret <secret>
If you want to provide high availability and load balancing for your iSCSI disks, you may use several redundant network components (network adapters, network switches) and an MPIO module.