The main advantage of virtual machines is the flexibility to allocate additional resources to VMs when you need them. If you run out of free space on a virtual hard disk, you can extend it quickly and easily. This article describes how to resize a virtual machine disk in VMware ESXi and then extend the partition in Windows or Ubuntu guest OS without stopping or rebooting the virtual machine.
When it comes to increasing the size of a VMware virtual machine’s hard disk, there are some limitations to consider:
- You cannot increase the disk if the VM has snapshots. All snapshots must be removed;
- Only disks connected via virtual SCSI or NVMe controller can be expanded online (if the virtual disk is connected via IDE controller, the virtual machine must be shut down first);
- The extending option is not supported for Linked Clone VMs (on Vmware Horizont);
- If you see a warning in the VM panel that says ‘
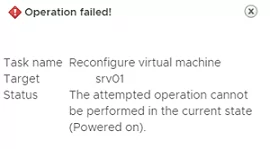
Virtual Machine disks consolidation is needed’, you need to consolidate VM disks; - The online extension of virtual machine disks (without shutting down the VM) is only possible if the VMware Tools are installed in the guest operating system. If VMTools is not installed, an error occurs after changing the virtual disk size:
Operation failed
Task name
Reconfigure virtual machine
The attempted operation cannot be performed in the current state (Powered on).
The process of increasing a virtual machine’s disk size takes two steps:
- First, you need to increase the VMDK file size in the VM settings on vCenter/ESXi;
- Then extend the disk partition in the guest OS (we will take a separate look at how to extend the hard drive on both Windows and Linux).
Increase the Size of VM Disk (VMDK) in VMware
For example, you have a virtual machine with a single virtual hard disk file (vmdk) of 40GB, and you plan to increase this virtual disk size to 50GB.
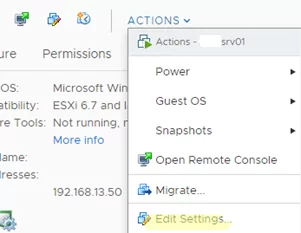
- Connect to your vCenter server or a standalone ESXi host using the vSphere Web Client;
- Find the virtual machine and open its settings (Actions -> Edit Settings);

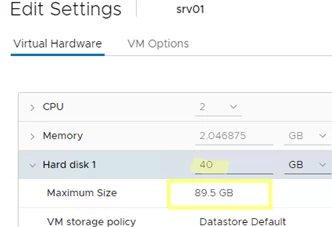
- Find the virtual disk you want to extend. In this example, the VM has only one Hard Disk 1 with a size of 40 GB. Specify the new disk size in this field and save the settings. Note that the maximum disk size available for this type of datastore (VMFS, NFS, vSAN) is specified in the Maximum size field;
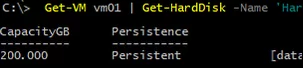
You can also use the VMware PowerCLI module cmdlets to increase the size of the virtual machine VMDK disk. Install the PowerCLI module on your computer (you can even install the PowerShell module on a Linux host) and connect to your vCenter/ESXi:
Connect-VIServer hostname
Run the following command to expand the virtual disk:
Get-HardDisk VMTest1 | where {$_.Name -eq "hard disk 1"} | Set-HardDisk -CapacityGB 50 -ResizeGuestPartition -Confirm:$false
Then you can use the Invoke-VMScript cmdlet to extend a partition in the guest operating system:
Invoke-VMScript -VM VMTest1 -ScriptText "echo select vol c > c:\diskpart.txt && echo extend >> c:\diskpart.txt && diskpart.exe /s c:\diskpart.txt" -GuestUser $guestUser -GuestPassword $guestPass -ScriptType BAT
Don’t forget to terminate the PowerShell management session once you’re done:
Disconnect-VIserver -Confirm:$false
Now that you have increased the virtual disk size in the VMware console, you need to extend the partition in the guest OS
Extend a Partition in a Windows Virtual Machine
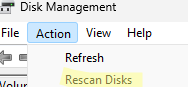
You must start the Disk Management console (Computer Management-> Storage-> Disk Management) and run the Rescan Disk command for the guest Windows OS to see the additional space.
Next, select the partition you want to extend and click Extend Volume. 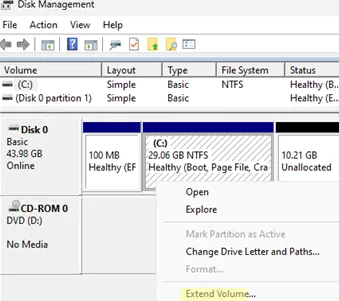
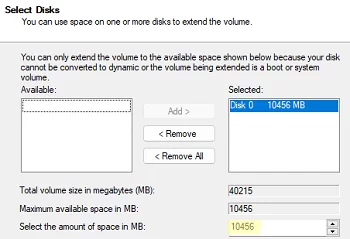
Specify how many MB of unallocated space you want to add to the selected Windows partition (in the field Select the amount of space in MB).
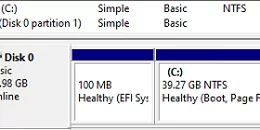
Now click Next -> Finish and check if your C drive has been successfully extended.
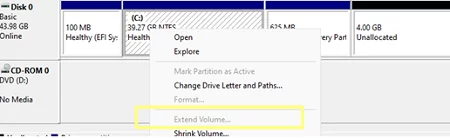
In that case, you won’t be able to extend your C: drive unless you delete or move the Recovery partition to the end of the drive. We have described this procedure in the article Extend Volume option is grayed out in Windows.
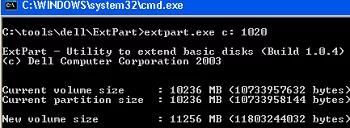
Windows XP and Windows Server 2003 don’t support the online extension of the system C: volume. You can use Dell’s ExtPart tool to expand the system partition without rebooting.
To extend the system partition in Windows 2003/XP, copy the tool to the guest operating system and run it with the following parameters:
extpart.exe c: 1020
, where c: is the name of the volume you want to extend, and 1020 is the size (in MB) you want to extend the disk by.
You can also extend the offline VM disc partition in other ways:
- Boot your virtual machine from any LiveCD (for example, GParted), and increase the partition;
- Connect a virtual VMDK file to another VM and extend the partition on that machine;
- Use the VMware vCenter Converter tool to reconfigure the volume size.
How to Extend Partition in Linux Virtual Machine?
Now let’s look at how to expand the disk partition if you have a Linux family guest operating system installed in your virtual machine.
The first thing to do is to make sure that Linux sees the new disk size. To start a rescan, run the command:
$ echo 1>/sys/class/block/sdd/device/rescan
Use the cfdisk tool to show the available virtual hard disk space:
$ sudo cfdisk
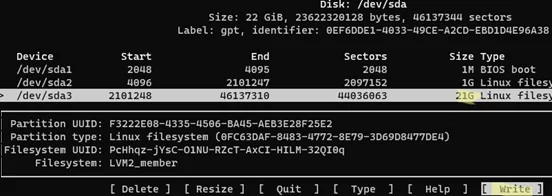
This example shows that the /dev/sda drive has 2 GB of free space. Select the partition you want to extend (which is /dev/sda3 in this example) and chose Resize from the bottom menu.
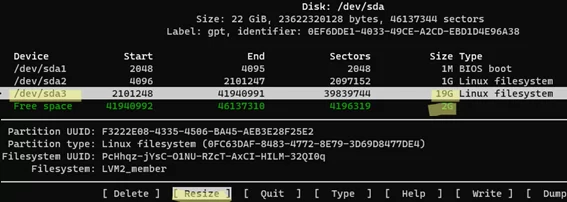
Then click Write to apply the changes to the partition.
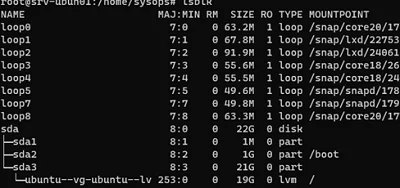
In my case, I need to extend the partition in an Ubuntu 22.04 LTS virtual machine. By default, this version of Ubuntu is installed on LVM volume:
$ sudo lsblk
Before you can extend an LVM volume, you need to increase the physical volume (PV):
$ sudo pvresize /dev/sda3
Once that’s done, you can extend the logical volume (we’ll use all the free space available):
$ sudo lvextend -l +100%FREE /dev/mapper/ubuntu--vg-ubuntu--lv

The next step is extending the file system:
$ sudo resize2fs /dev/mapper/ubuntu--vg-ubuntu--lv
Check free disk space in Linux:
$ df -h

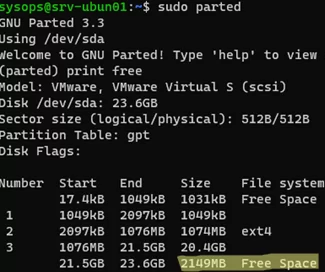
If you do not have LVM volumes, you can use the parted tool to extend partitions in Linux:
$ sudo parted
Let’s check how much unallocated space you have on the disk:
print free
As you can see, Free Space = 2149MB
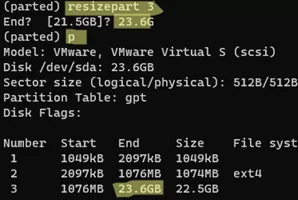
To extend the /dev/sda3 partition, run:
resizepart 3
Specify a new partition size (in this example, we need to specify the End size from the Free Space block):
End? [21.5GB]? 23.6G
Then exit the parted:
quit
All that remains is to grow an ext4/3/2 file system.
$ sudo resize2fs /dev/sda3
This article describes how to increase the size of a virtual hard disk in a VMware vSphere environment with a Windows and Linux guest operating system. In a separate article, we have explained how to reduce (shrink) the size of a virtual hard disk on VMware.