UWF (Unified Write Filter) is a special file system write filter in Windows 10 that allows you to protect Windows system and user files on the local drive from any changes. When the UWF filter is enabled, any write operations to a protected disk or to the system registry are intercepted by the UWF filter driver and placed in a separate virtual space (overlay). After restarting Windows, all changes on protected drives are not saved, i.e. Windows always reverts to its original state when the UWF filter was enabled.
How does a UWF filter work? It protects the file system of the selected partitions on the local disks from changes by transparently redirecting all file system write operations into virtual overlay where all changes are stored.
How to Enable and Configure Unified Write Filter on Windows 10?
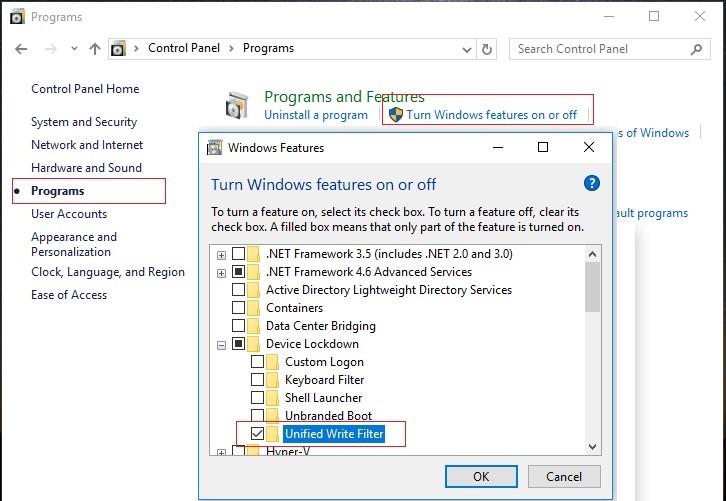
The UWF filter is a separate Windows feature that is enabled through the Control Panel -> Programs and Features -> Turn Windows Features On or Off -> Device Lockdown -> Unified Write Filter.
The UWF feature can also be installed using PowerShell:
Enable-WindowsOptionalFeature -Online -FeatureName "Client-UnifiedWriteFilter" –All
Or DISM:
DISM.exe /Online /enable-Feature /FeatureName:client-UnifiedWriteFilter
The uwfmgr.exe console tool is used to manage UWF settings.
To enable UWF filter on Windows 10, run the following command and restart your computer:
uwfmgr.exe filter enable

After enabling the UWF filter, it automatically reconfigures the system to exclude unnecessary disk write operations (paging file, restore points, file indexing, defragmenting are disabled).
To enable write protection for a specific drive, run this command:
uwfmgr.exe volume protect c:
Now restart your computer. After the restart, everything that a user writes on the disk during the session will be available only till the next computer reboot. Any changes will be discarded.
You can check the UWF status using this command:
uwfmgr.exe get-config

In this example you can see that the system disk is protected, the UWF filter is enabled (Volume state: Protected).
The current overlay settings in which the UWF stores temporary data can be displayed using the command:
uwfmgr overlay get-config
You can configure the following UWF overlay parameters:
- Type – overlay type. You can store data on disk (DISK) or in RAM;
- Maximum size – the maximum overlay size;
- Warning Threshold – overlay size, if exceeded, a warning should be displayed;
- Critical Threshold – the size of the overlay, if exceeded, a UWF error will appear;
- Freespace Passthrough – used only for disk overlay mode. Allows you to write data to any free space on the disk, and not to a special file.
The default is a 1 GB RAM overlay.
You can change overlay settings (if you have enough free RAM):
uwfmgr overlay set-size 8192
 uwfmgr overlay set-criticalthreshold 8192
 uwfmgr overlay set-warningthreshold 7168
If you need to use DISK overlay, run the command:
uwfmgr overlay set-type Disk
The current size of the data in the overlay can be displayed as follows:
uwfmgr overlay get-consumption
Remaining free space:
uwfmgr overlay get-availablespace
Unified Write Filter Servicing on Windows 10
When performing system maintenance tasks (installing updates, updating antivirus signatures), you need to put your Windows device into a special UWF servicing mode:
uwfmgr servicing enable

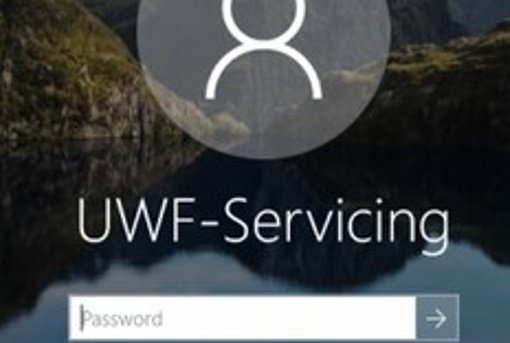
After restarting, Windows will boot under the local UWF-Servicing account and automatically install available Windows updates (via Windows Update or approved WSUS updates), update antivirus signatures. If you wish, you can log on to the computer under the UWF-Servicing account (the password for this user is unknown, but you can reset it).
After the UWF-Servicing user is automatically logged on, the uwfservicingshell.exe tool starts, which runs the Windows 10 servicing scripts. You cannot do anything else in service mode.
After the updates are installed, the computer will automatically restart in normal mode with the UWF filter enabled.
You can also install Windows updates without going into Servicing mode. Use the command:
uwfmgr servicing update-windows

Unified Write Filter updated Windows result: REBOOT REQUIRED.
Adding Unified Write Filter Exclusions on Windows 10
If you need to force a modified file to be saved to disk while the UWF filter is enabled, you need to run the command:
uwfmgr file commit C:\Labs\MyApp.exe
Now the file won’t be deleted even if you restart Windows.
To completely remove a file with UWF enabled, use the command:
uwfmgr file commit-delete C:\Labs\MyApp.exe
uwfmgr registry commit ...
 uwfmgr registry commit-delete ...
You can add certain files, directories or registry keys to the list of UWF exclusions. The changes you make to these items will be written directly to the disk, and not to the overlay.
To add a specific file or folder to exclusions, run the following command:
Uwfmgr.exe file add-exclusion c:\labs
Or:
Uwfmgr.exe file add-exclusion c:\labs\report.docx
To add an exclusion for the registry key:
Uwfmgr.exe registry add-exclusion “HKLM\Software\My_RegKey”
You must restart your computer to apply new exclusion list.
To list the exclusions of a UWF filter, run the command:
uwfmgr file get-exclusions
To remove a file from exclusions:
uwfmgr file remove-exclusion c:\student\report.docx
You cannot add exclusions for some system files or folders, like:
- Registry files in \Windows\System32\config\;
- Root of the volumes;
- \Windows, \Windows\System32, \Windows\System32\Drivers;
- Pagefile.sys, swapfile.sys;
- Etc.
To make some services work correctly, you have to add paths to their directories, files and registry keys to the exclusion list. I’ve collected typical exclusions for some Windows subsystems below:
Exclusions for BITS:
- % ALLUSERSPROFILE%\Microsoft\Network\Downloader
- HKEY_LOCAL_MACHINE\Software\Microsoft\Windows\CurrentVersion\BITS\StateIndex
Exclusions for the correct work in wireless networks (these exceptions will allow you to connect to Wi-Fi networks and save WLAN profiles):
- HKEY_LOCAL_MACHINE\SOFTWARE\Policies\Microsoft\Windows\Wireless\GPTWirelessPolicy
- C:\Windows\wlansvc\Policies
- HKEY_LOCAL_MACHINE\SOFTWARE\Microsoft\wlansvc
- C:\ProgramData\Microsoft\wlansvc\Profiles\Interfaces\{<Interface GUID>}\{<Profile GUID>}.xml
- HKEY_LOCAL_MACHINE\SYSTEM\CurrentControlSet\services\Wlansvc
- HKEY_LOCAL_MACHINE\SYSTEM\CurrentControlSet\services\WwanSvc
Exclusions for the correct work in wired networks:
- HKEY_LOCAL_MACHINE\SOFTWARE\Policies\Microsoft\Windows\WiredL2\GP_Policy
- C:\Windows\dot2svc\Policies
- HKEY_LOCAL_MACHINE\SOFTWARE\Microsoft\dot3svc
- C:\ProgramData\Microsoft\dot3svc\Profiles\Interfaces\{<Interface GUID>}\{<Profile GUID>}.xml
- HKEY_LOCAL_MACHINE\SYSTEM\CurrentControlSet\services\dot3svc
Exclusions for Windows Defender
- C:\Program Files\Windows Defender
- C:\ProgramData\Microsoft\Windows Defender
- C:\Windows\WindowsUpdate.log
- C:\Windows\Temp\MpCmdRun.log
- HKEY_LOCAL_MACHINE\SOFTWARE\Microsoft\Windows Defender
How to Reset or Disable UWF Filter?
You can reset the UWF filter settings to the initial ones (at the moment the filter is turned on):
uwfmgr filter reset-settings
To completely disable UWF (after a reboot, all changes on the disk will be saved):
uwfmgr.exe filter disable
Or you can disable the filter for a specific volume:
uwfmgr.exe volume unprotect E:
- Disable UWF driver autostrart by changing the value of Start parameter to 4 in the reg key HKEY_LOCAL_MACHINE\SYSTEM\ControlSet001\Services\uwfvol;
- Delete the uwfvol string in HKEY_LOCAL_MACHINE\SYSTEM\ControlSet001\Control\Class\{71a27cdd-812a-11d0-bec7-08002be2092f}\Lower Filters
UWF with HORM (Hibernate Once/Resume Many) on Windows 10
Starting with Windows 10 1709, another UWF filter mode appeared – Hibernate Once/Resume Many (HORM). This mode allows you to quickly get the state of Windows with running apps and open files. Every time the computer boots up, Windows immediately returns to this state.
Limitations of HORM Mode on Windows 10:
- UWF filter must be enabled for all local (fixed) drives;
- UWF filter exceptions are not supported;
- Overlay works in RAM mode (disk-overlay is not supported);
- Hibernation and Fast Startup are disabled.
To enable HORM, you need to run the command:
uwfmgr filter enable-horm

Unified Write Filter enabled HORM. Please hibernate the system to use HORM functionality. The system must be hibernated at least once after run enable-horm command, or it may bring the system into corrupted state.
Configure the user’s working environment (run the required applications, open files, etc.). Then put the computer into hibernation mode with the command:
shutdown /h
Wake up your computer and restart it. On the next reboot, Windows 10 will immediately start in the state stored in the hibernation file.
To disable HORM mode, run the command:
uwfmgr filter disable-horm
UWF offers some interesting scenarios:
- Improving Windows performance (nothing is written on the disk, all write operations are performed in the memory, like on a RAM disk);
- You can reduce wear on solid-state drives (SSD/CompactFlash) due to less write operations;
- Experimenting, testing of third-party software and studying malware (for these purposes, you can also use the Windows 10 Sandbox).
5 comments
Hello, I tried to follo many HowTos to activate UWF on Windows 10 LTSB (after installing also last available Cumulative Update and Maintenance Stack Update). After setting correctly UWF filter on C: partition, I have many troubles related to Windows that is trying to download Updates and Language Update Packs. Is this a normal condition? Must I lock by myself all Windows attempts to update itself? To lock Windows Updates I found on internet a small utility called Wub (I don’t know if I can post it’s download URL) that locks Windows Update Service start locking also it’s start settings, because it seems that Windows 10 maintenance task re-enable it automatically. How can I block language updates? Are there other updates processes to block? How?
Regards
Mauro
You can configure your devices to receive updates from your WSUS (https://woshub.com/installing-configuring-wsus-on-windows-server-2012/) server with the manual approving of new updates for your Win 10 LTSB edition, or regularly (once a month) install Windows security patches from Windows Update servers in accordance with the article “Apply Windows updates to UWF-protected devices” (https://docs.microsoft.com/en-us/windows-hardware/customize/enterprise/uwf-apply-windows-updates)
https://docs.microsoft.com/en-us/windows-hardware/customize/enterprise/uwf-antimalware-support lists more registry exclusions for the Windows Defender than described here. Unfortunately, after excluding
HKEY_LOCAL_MACHINE\SYSTEM\CurrentControlSet\Services\WdBoot
HKEY_LOCAL_MACHINE\SYSTEM\CurrentControlSet\Services\WdFilter
HKEY_LOCAL_MACHINE\SYSTEM\CurrentControlSet\Services\WdNisSvc
HKEY_LOCAL_MACHINE\SYSTEM\CurrentControlSet\Services\WdNisDrv
HKEY_LOCAL_MACHINE\SYSTEM\CurrentControlSet\Services\WinDefend
PC did not boot anymore and was hanging there with the rotating donut. Problem occurred after 2nd restart! After restoring the partition from an image to bring the system back to live and removing the mentioned exclusions the PC works again.
Don’t know what really causes the troubles but I will never ever add these exclusions again.
I want to make a script, that will check the enable or disable-status of the write filter, depending on its current state.
$State = uwfmgr.exe filter get-config
Select-String -inputObject $State -pattern “Filter State: OFF”
This actually doesn’t work. Can anybody improve that?
Alternately, can get the state from the registry value
HKLM\SYSTEM\CurrentControlSet\Services\uwfvol\parameters\static\copy0, UwfEnabled – 0 Disabled , 1 Enabled (Next Session)
HKLM\SYSTEM\CurrentControlSet\Services\uwfvol\parameters\static\copyV, UwfEnabled – 0 Disabled , 1 Enabled (Current Session)