In this article we’ll look on how to install and configure the KVM hypervisor on a server running Linux RHEL or CentOS. We will show how to create a virtual machine in KVM, change its settings and install a guest operation system. We will also describe some typical commands to manage a VM.
KVM (Kernel-based Virtual Machine) is a Linux hypervisor that uses Intel VT- or AMD SVM hardware virtualization technologies. Using KVM, you can create isolated virtual machines with their own virtual hardware: network adapters, disks, graphic cards or other devices. You can install any guest OS on a virtual machine (not only Linux).
How to Install KVM on CentOS/RHEL?
When you configure KVM on your server, you should start with a CPU check. You must make sure if the CPU installed on your host supports hardware virtualization. Run the following command in your server console:
# cat /proc/cpuinfo | egrep "(vmx|svm)"
If your processor supports VT-x, you will see an output like this:

If the command has returned nothing, but you know that your CPU supports virtualization, make sure that this option is not disabled in the server BIOS. Look for Intel Virtualization Technology or SVM MODE options.
My server supports the VT-x and it is enabled, so we can install the necessary packages on CentOS/RHEL using yum/dnf:
# yum install libvirt libvirt-python libguestfs-tools qemu-kvm virt-install –y
- qemu-kvm – the KVM hypervisor
- libvirt – virtualization management libraries
- virt-install – CLI tools to manage KVM virtual machines
A lot of packages will be installed on your Linux server. Make sure that no errors occur during the installation.
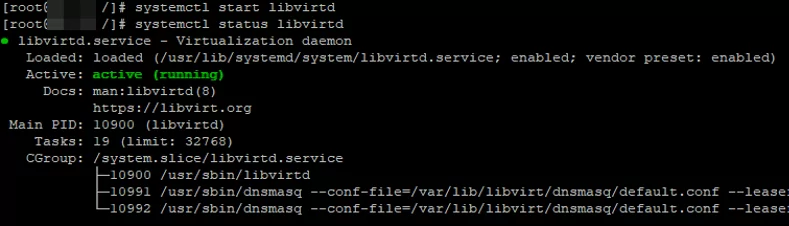
Then add the libvirtd service to startup and run it:
# systemctl enable libvirtd
 # systemctl start libvirtd
Make sure that kvm_intel and kvm kernel modules have been loaded:
# lsmod | grep kvm
kvm_intel 188688 0
kvm 636931 1 kvm_intel
irqbypass 13503 1 kvm
If the command returns nothing, restart your host and check again.
Create and Configure Bridge Networking for KVM
Then create directories to store virtual machine disks and ISO images in:
# mkdir -p /vz/{disk,iso}
In order your virtual machines have the Internet access, you must configure network using bridge. To do it, you will need the bridge-utils. Make sure if it is installed on your Linux host using this command:
# rpm -qa | grep bridge-utils
Install it if needed:
# yum install bridge-utils -y
After installing the package, the virbr0 network interface appeared in the operating system:
# ip a

To create a bridge, you must set up the configuration file of your server network interface:
# cp /etc/sysconfig/network-scripts/ifcfg-enp1s0f0 /etc/sysconfig/network-scripts/ifcfg-enp1s0f0_bak – back up the file
# nano /etc/sysconfig/network-scripts/ifcfg-enp1s0f0 — open it to edit
Delete the file contents and replace it with the following:
DEVICE="enp1s0f0"
ONBOOT="yes"
BRIDGE=br0
In your case, the interface name may be different (get it using the ip a command).
Then create a file:
# nano /etc/sysconfig/network-scripts/ifcfg-br0
containing the following config:
DEVICE="br0"
TYPE=BRIDGE
ONBOOT=yes
BOOTPROTO=static
IPADDR="IP_address_of_the_server"
NETMASK="255.255.255.0"
GATEWAY="Default_gateway"
DNS1="8.8.8.8"
DNS2="8.8.4.4"
You must specify your server IP address and default gateway. After you have edited the network interface configuration file, restart the network:
# service network restart
To view the bridge state, use this command:
# brctl show
bridge name bridge id STP enabled interfaces
br0 8000.ac1f6b654321 no enp1s0f0
virbr0 8000.525400abcdef1 yes virbr0-nic
On the last step, configure the network traffic forwarding:
# echo -e "net.ipv4.ip_forward=1" >> /etc/sysctl.conf && sysctl -p
Then restart libvirtd:
# service libvirtd restart
The basic KVM network configuration is over, and you can create a virtual machine.
Creating Virtual Machines in KVM
Prior to creating a virtual machine, I have downloaded a CentOS 8 image from an official mirror to /vz/iso:
# cd /vz/iso && wget http://mirror.imt-systems.com/centos/8.3.2011/isos/x86_64/CentOS-8.3.2011-x86_64-dvd1.iso
To create a new KVM virtual machine, run the following:
virt-install -n test-centosvm \
 --noautoconsole \
 --network=bridge:br0 \
 --ram 2048 --arch=x86_64 \
 --vcpus=4 --cpu host --check-cpu \
 --disk path=/vz/disk/test-centosvm.img,size=32 \
 --cdrom /vz/iso/CentOS-8.3.2011-x86_64-dvd1.iso \
 --graphics vnc,listen=IP,password=p@sswdr0w1 \
 --os-type linux --os-variant=rhel7 --boot cdrom,hd,menu=on
test-centosvm— a VM namenoautoconsole– after creating a VM, you won’t connect to the VM console automaticallynetwork– a network type (bridge, in my case);ram— the amount of RAM in the VM;vcpus– the number of CPU cores (vCPU configuration for a VM)disk– a virtual disk, path – a path to the disk, size – the size of the disk (you can extend/shrink it later)cdrom– a virtual CDROM, an ISO image to install a gust OS is mounted to;graphics— parameters to connect to a virtual machine using the graphic console. We will use VNC to connect to it, so for listen specify the IP address of the KVM server, on which you have created the VM, and the password to connect to the virtual machine console
To make the VM boot automatically, run:
# virsh autostart test-centosvm
How to Connect to a KVM VM Using VNC and Install an OS?
To connect to a KVM virtual machine using VNC, you need to find out the port it is running on:
# virsh vncdisplay test-centovms
IP:0
0 means that the port number to connect using VNC is 5900. If you get a different value, just add the number the command has returned to 5900.
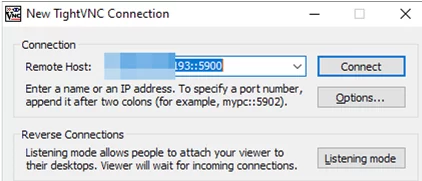
To connect to servers using VNC, I am using TightVNC. Run it and specify the IP address of your server and the VNC port we got earlier (with a double colon as a separator).
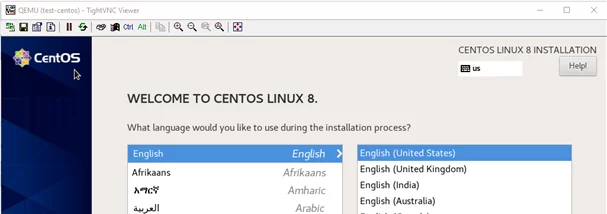
Click Connect and enter the password you set when creating your KVM VM. If you have done it correctly, the server console appears, in which CentOS installation (or another guest OS, which image you have mounted) is running.
If a firewall is enabled on your server, open ports 5900-5910 for VNC in firewalld/iptables (ten ports will be enough). After installation of a guest OS on a virtual machine, start the VM from the server console:
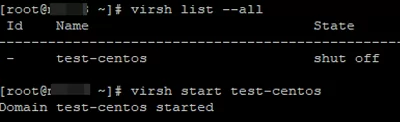
To shut down a KVM virtual machine, use this command:
# virsh shutdown test-centosvm
To display a list of all registered KVM virtual machines:
# virsh list --all
Basic KVM host configuration is over, and a virtual machine has been created. You can create any number of virtual machines in KVM, it depends only on your server resources and your needs.