After reinstall/clean install Windows, the user needs to install the latest driver versions for the devices installed on the computer. The user must manually find, download and install the necessary drivers. However, there is an easier way to install the device drivers on Windows 10 and 8.1. You can back up (export) all the installed drivers before reinstalling Windows and use such a backup to quickly install all drivers on a clean Windows installation.
In this article, we’ll show you the basic ways to backup and restore all the drivers installed in Windows using built-in tools (DISM, pnputil.exe, or Export-WindowsDriver PowerShell cmdlet).
PowerShell: Backup Drivers Using the Export-WindowsDriver Cmdlet
On Windows 10 and Windows Server 2019/2016, you can use the Export-WindowsDriver PowerShell cmdlet to export all third-party (non-Microsoft) drivers installed on the device directly from the Driver Store. This cmdlet allows you to greatly simplify and speed up the process of reinstalling Window. Previously, to create a backup copy of the drivers installed on the computer, you had to use third-party apps (like DoubleDriver, DriverMax, etc).
In order to export all the installed third-party drivers directly from the current Windows 10 online image, open the PowerShell console as administrator and run the following command:
Export-WindowsDriver –Online -Destination c:\export-drivers
If you need to extract drivers from the offline Windows image mounted, the command should look like this:
Export-WindowsDriver -Path c:\win_image -Destination c:\export-drivers
After running the cmdlet, the screen displays information about all exported third-party drivers. You will get a backup copy of all Windows drivers from the C:\Windows\System32\DriverStore\FileRepository\ directory. Each driver and all associated files are saved in its own directory, which is named by the name of the driver’s INF file.
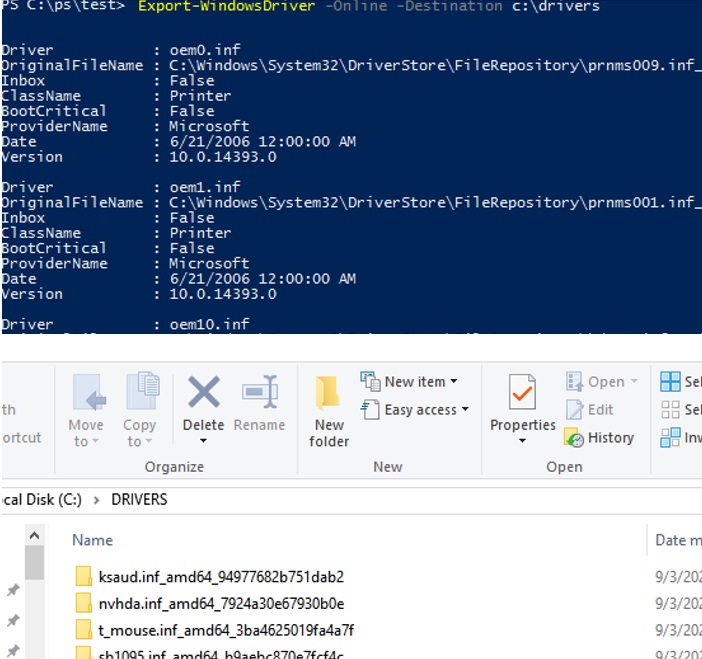
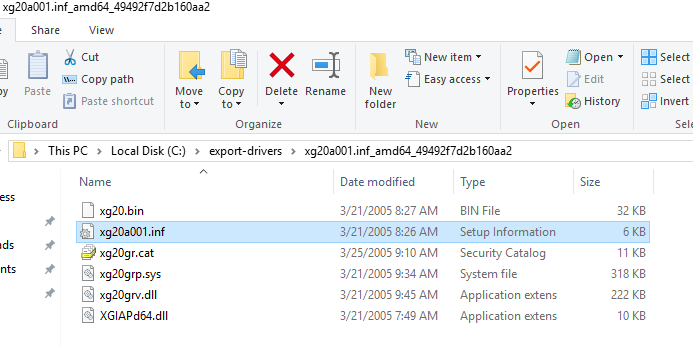
Each directory contains all the files that are necessary to install the driver (not only *.inf files, but all associated *.sys, *.dll, *.exe, and other types of files). The Export-WindowsDriver cmdlet builds a list of files that are required to install the driver as specified in the CopyFiles section of the driver inf file.
To display a list of saved drivers in a convenient form with the class, vendor, and the driver version, let’s export the drivers using two commands:
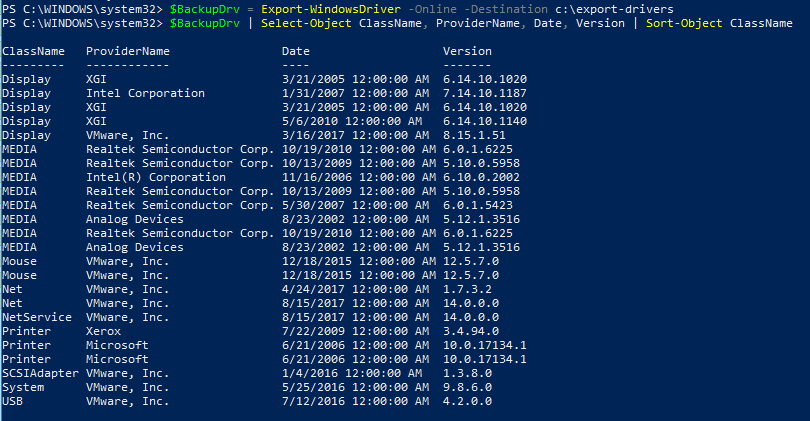
$BackupDrv = Export-WindowsDriver -Online -Destination c:\export-drivers
After that let’s display the results in the table:
$BackupDrv | Select-Object ClassName, ProviderName, Date, Version | Sort-Object ClassName
As you can see, the resulting table shows the driver class, manufacturer, version, and date.
You can save information about exported drivers to a CSV file:
$BackupDrv| Select-Object ClassName, ProviderName, Date, Version |Export-Csv c:\ps\backup_drivers_list.txt
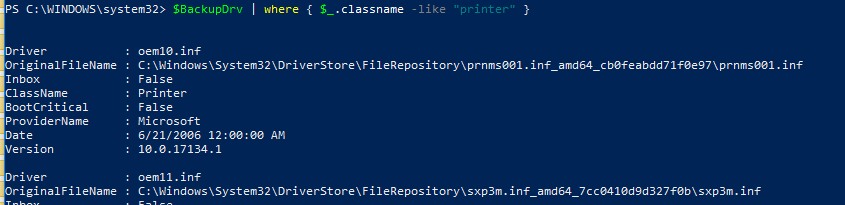
You can list the drivers for a specific device class using the ClassName attribute. For example, to list only printer drivers run the following command:
$BackupDrv | where { $_.classname -like "printer" }
To display a list of drivers for a specific vendor, use the command:
$BackupDrv | Where{ $_.ProviderName -Match "NVIDIA"}
You can name the driver directory according to your computer model and save a backup of the drivers to a shared network folder where you store drivers for all computer models. In this case, use the command:
Export-WindowsDriver -Destination "\\mun-fs01\drivers\desktop\$((Get-WmiObject -Class win32_computersystem).Model)" -Online
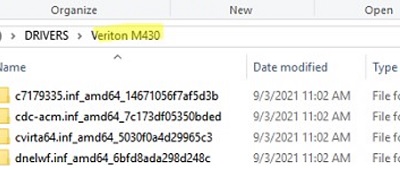
As you can see, a directory has been created with the name of the computer model and all drivers are exported in it.
[/alert]
Backup Drivers on Windows 10 Using DISM
You can also use the DISM.exe to backup drivers and import them into a Windows image. To export all drivers to the C:\export-drivers directory, open an elevated command prompt and run the command:
dism /online /export-driver /destination:C:\export-drivers
Exporting 1 of 24 – oem0.inf: The driver package successfully exported.
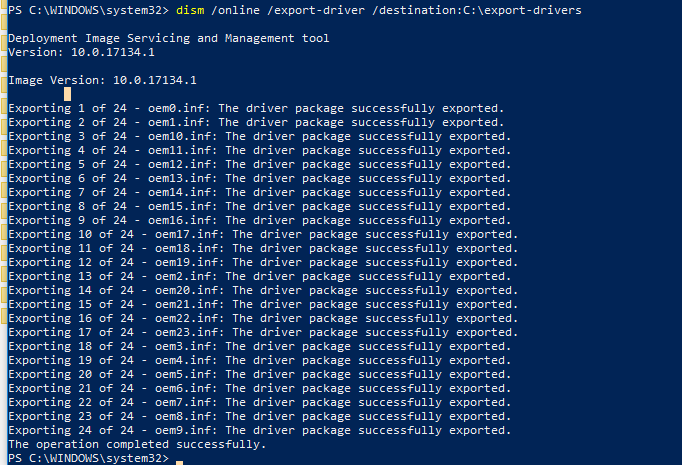
As you can see in our example, the DISM tool successfully exported 24 drivers to the specified directory.
Exporting Installed Device Drivers Using PNPUtil
You can manage device drivers on your computer using the built-in PNPUtil.exe tool. This tool is commonly used to add or remove drivers in Windows (previously we showed how to remove old and unused device drivers from the Windows Driver Store to save disk space). The PNPUtil can also be used to export drivers from the Windows repository.
Open an elevated command prompt and run the command:
pnputil.exe /export-driver * c:\export-drivers
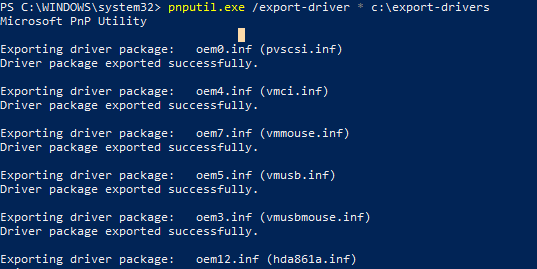
Drivers from the resulting directory can be deployed to other devices manually using PowerShell, PNPUtil, DISM (How to slipstream drivers into a Windows image), or automatically with MDT, SCCM, etc.
With pnputil, you can only export a specific device driver. To do this, you need to get the name of its INF file.
Get a complete list of installed drivers:
pnputil.exe /enum-drivers
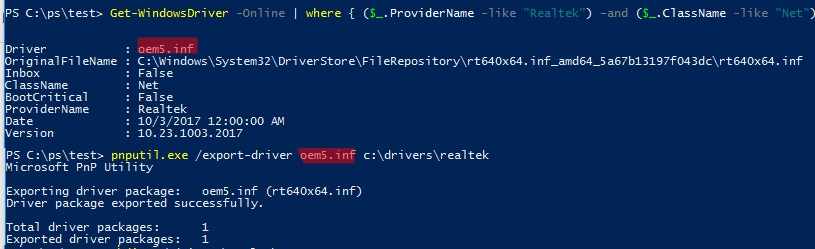
Or you can use PowerShell to filter the list of drivers. I only need to export the Realtek NIC drivers:
Get-WindowsDriver -Online | where { ($_.ProviderName -like "Realtek") –and ($_.ClassName -like "Net")}
Copy the name of the inf file (oem5.inf) and run the following command to export the driver files:
mkdir c:\drivers\realtek
 pnputil.exe /export-driver oem5.inf c:\drivers\realtek
As a result, you exported the NIC inf file (rt640x64.inf) with all the necessary files.
How to Restore Device Drivers on Windows 10?
You can use the directory with a backup copy of the device drivers to install them on a clean Windows installation (or after reinstalling Windows).
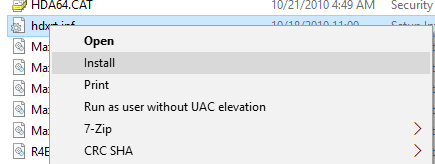
To install a specific driver, right-click on the INF file and select the “Install” menu item.
You can also update a specific device driver through the device manager. Open the Device Manager console (devmgmt.msc), select the device which driver you want to replace, click “Update Driver” -> “Browse my computer for driver software“. Specify the path to the directory with the drivers’ backup. To automatically scan all subfolders for inf files, select the option “Include subfolders”.

However, there is an easier way to install (import) all the drivers from the specified directory at once. To do this, use the following PowerShell script:
$drvinffiles = Get-ChildItem -Path "C:\export-drivers\" -Filter "*.inf" -Recurse -File
 foreach($drvinffile in $drvinffiles){
 $drvinffile.FullName
 pnputil.exe -i -a "$drvinffile.FullName"
 }
This PowerShell script sequentially scans all folders in the specified directory, searches for all inf files, and installs drivers in the Driver Store using the PNPUtil tool.
pnputil.exe /add-driver C:\export-drivers\*.inf /subdirs /install
You can also import all the drivers from the backup directory into the offline Windows image by using the Add-Driver parameter of the DISM tool (in this example, we allow the installation of unsigned drivers):
DISM /image:c:\win_image /Add-Driver /Driver:C:\export-drivers /Recurse /ForceUnsigned
Be sure to back up your installed drivers before reinstalling Windows.
5 comments
Thanks so much! I was looking for something exactly like this. Just did the backup, and next week when my new ssd arrives, I will test how it will work on the restore part. Thanks again
How can I then export that list into something else, like csv?
Use this Powershell command to export output of Export-WindowsDriver to CSV file:
$BackupDrivers | Select-Object ClassName, ProviderName, Date, Version |Export-Csv c:\temp\test.txt
Cómo hago para importarlos a Windows 10, tras haber exportado los drivers?
Awesome!