In this article we will talk about the WinSxS folder in Windows, the reasons of its constant growth and ways to clean up it. The C:\Windows\WinSxS directory is the repository of Windows components. This directory contains DLLs, binary and XML files necessary for installation and operation of various Windows roles or features. When installing the Windows updates (usually this happens every month), the new version of the updated component is installed on the system, while the old one is saved to the WinSxS folder (it is necessary to provide compatibility and make it possible to rollback to the previous versions of the components when you uninstall the Windows update).
The WinSxS directory has grown in size over time. Moreover, its size is not limited by anything (although in practice the size of the WinSxS folder in Windows 10 rarely exceeds 15-20 GB).

In this article, we’ll go over the safest ways to clean up the WinSxS folder on Windows 10 and Windows Server 2016/2019:
- Optimize the component store and remove old versions of Windows component files left after installing Windows updates;
- Features on Demand – allows you to remove unused Windows components from the disk;
- Enable NTFS compression on the WinSxS folder – a way to reduce the size of the WinSxS directory using the built-in compression of the NTFS file system.
How to Check the Actual Size of WinSxS Folder on Windows 10?
The easiest way to get the current size of the WinSxS folder on Windows is to open the properties of the %windir%\WinSxS folder in File Explorer (or use a PowerShell script). But keep in mind that most file managers (including File Explorer) show a slightly larger WinSxS folder size than it takes on disk.
The fact is that the WinSxS directory contains a large number of hard links (symbolic links) to system files in other folders. File managers, when calculating the size of the WinSxS folder, take into account the size of files referenced by hard links, but this is not correct.
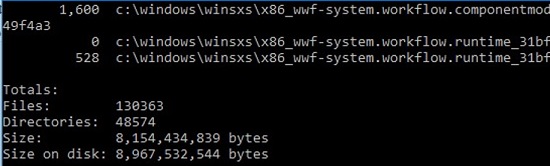
You can find out the real size of the WinSxS folder on disk using the du tool from Sysinternals:
du -v c:\windows\winSXS
You can also analyze the size of the component store (WinSxS folder) using the DISM command:
Dism.exe /Online /Cleanup-Image /AnalyzeComponentStore
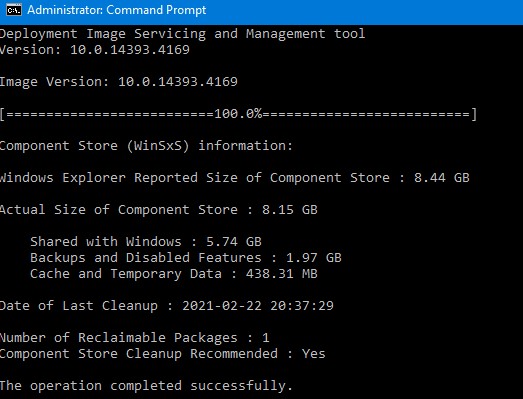
Deployment Image Servicing and Management tool
[==========================100.0%==========================]
Component Store (WinSxS) information:
Windows Explorer Reported Size of Component Store : 8.44 GB
Actual Size of Component Store : 8.15 GB
Shared with Windows : 5. 74GB
Backups and Disabled Features : 1.97 GB
Cache and Temporary Data : 438.31 MB
Date of Last Cleanup : 2021-02-22 20:37:29
Number of Reclaimable Packages : 1
Component Store Cleanup Recommended : Yes
The operation completed successfully.
As you can see, in this case, I can reduce the size of the WinSxS folder by (1,97 + 0,44) Gb.
DISM /Online /Cleanup-Image /RestoreHealth
How to Clean Up the Component Store (WinSxS folder) on Windows?
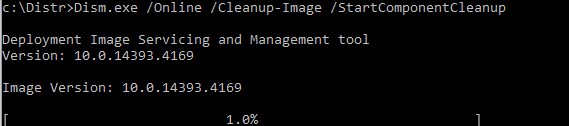
The fastest and easiest way to clear the Windows Component Store (the WinSxS folder) is to optimize the storage with the command:
Dism.exe /Online /Cleanup-Image /StartComponentCleanup
StartComponentCleanup DISM option is supported on all Windows versions starting from Windows 8 and Windows Server 2012.After cleaning is complete, check the current size of the component store:
Dism.exe /Online /Cleanup-Image /AnalyzeComponentStore
In my example, this reduced the size of the WinSxS folder by 2.4 GB.
The /StartComponentCleanup option has an additional /ResetBase option that allows you to remove all previous versions of components left after installing Windows updates. After that you won’t be able to remove installed updates or Service Packs, and the Uninstall button will disappear from the Uninstall an Update Control Panel item). To clean up old versions of components, run:
Dism.exe /Online /Cleanup-Image /StartComponentCleanup /ResetBase
DISM /online /Cleanup-Image /spsuperseded
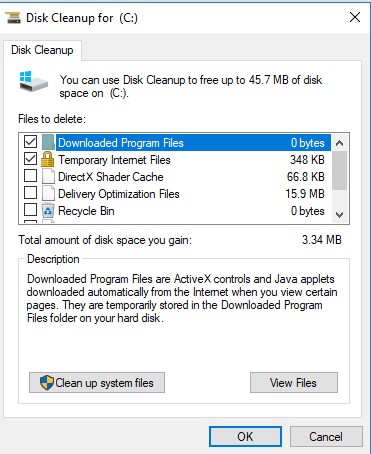
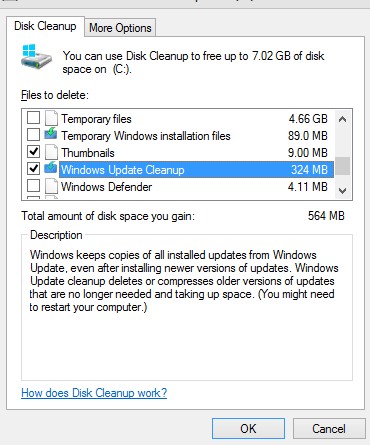
You can also remove old update files using the “Disk Cleanup” wizard:
- Run the
cleanmgrcommand as an administrator; - Select the disk and in the next window, click the “Clean up system files” button;

- Then select the “Windows update cleanup” option. The Disk Cleanup tool will show how much space you can free up by deleting old Windows update files. In my example, this is 324 MB. Click OK to start the cleanup.

After you finish cleaning up the component store using DISM, check how much disk space has been freed.
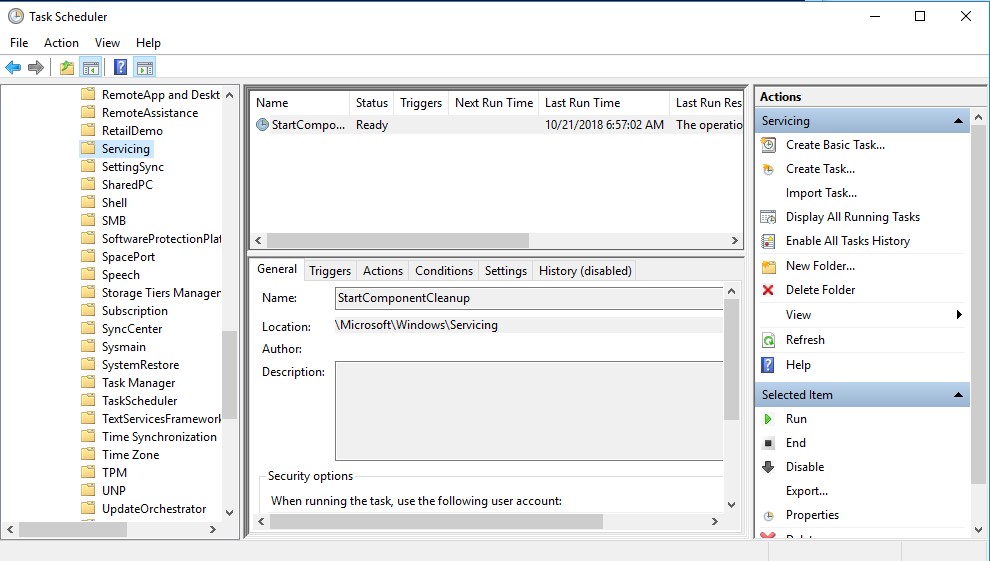
In addition, Windows 10/Windows Server 2016 Task Scheduler has a special automatic maintenance task that regularly optimizes and cleans up the WinSxS folder (same operation as DISM with StartComponentCleanup parameter). This StartComponentCleanup task is located under the \Microsoft\Windows\Servicing section of the taskschd.msc. This task runs in the background and automatically removes component versions older than 30 days that have been superseded by newer files.
You can start this task manually like this:
schtasks.exe /Run /TN "\Microsoft\Windows\Servicing\StartComponentCleanup"
Remove Unused Roles and Features from Windows 10/Windows Server
Features on Demand on Windows allows to remove binary files of the unused roles from the WinSxS folder. You can remove roles and features binaries on Windows Server using the Uninstall-WindowsFeature PoweShell cmdlet.
Windows 10 does not have the Uninstall-WindowsFeature cmdlet, and you must use DISM.exe to remove features from the Windows image.
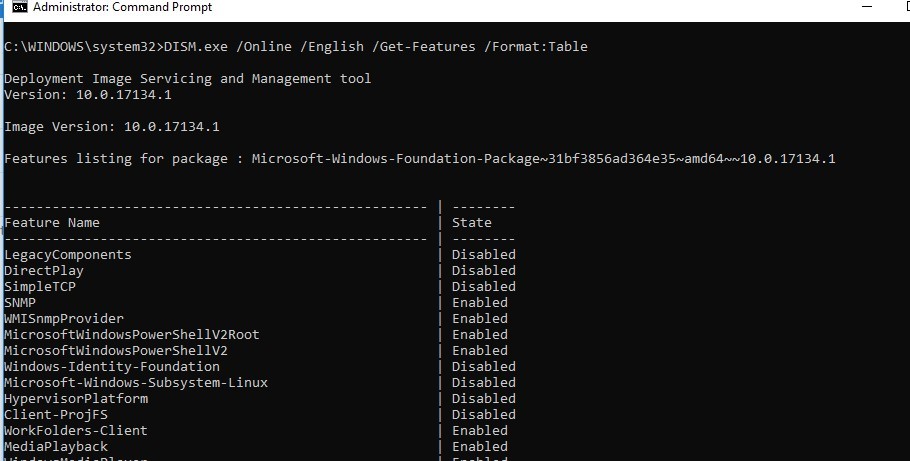
Uninstall-WindowsFeature PowerShell cmdlet, doesn’t remove dependent features.A complete list of available features in Windows 10 image can be obtained using the command:
DISM.exe /Online /English /Get-Features /Format:Table
To remove, for example, the TelnetClient feature from the Windows image (from the WinSxS folder), run the command:
DISM.exe /Online /Disable-Feature /Featurename:TelnetClient /Remove
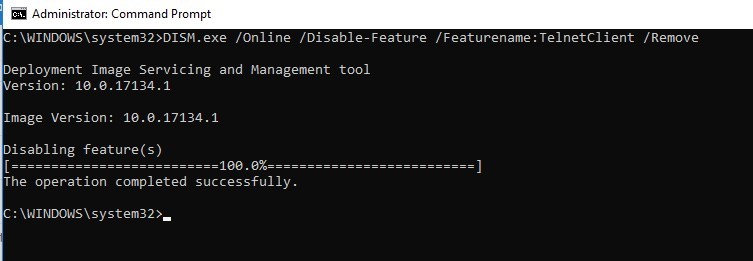
If you display the list of all on-demand features available in Windows, you will see that the component status has changed to Disabled with Payload Removed.
Thus, Windows allows to significantly reduce the size of the WinSxS folder by removing the unused components from the disk. The only thing is that this cleanup method suits only for the advanced users, who are familiar with the Windows 10 features and their purpose.
How to Enable NTFS Compress on WinSxS Folder on Windows 10?
Another way to reduce the size of the WinSxS directory on Windows 10 is to compress the directory contents on the level of the NTFS file system.
- Open the command prompt as administrator;
- Stop and disable Windows Installer and Windows Module Installer services:
sc stop msiserver
 sc stop TrustedInstaller
 sc config msiserver start= disabled
sc config TrustedInstaller start= disabled - Let’s backup the Access Control Lists (ACLs) assigned to the files and folders in the WinSxS directory using the built-in icacls tool. A backup copy of an ACL is a plain text file that lists all files and directories and the NTFS permissions assigned to them (later this file will be needed to restore the original ACLs):
icacls "%WINDIR%\WinSxS" /save "%WINDIR%\WinSxS_NTFS.acl" /t

- Assign yourself as an owner of the WinSxS folder and all its subfolders:
takeown /f "%WINDIR%\WinSxS" /r - Grant your account full control permissions on the WinSxS directory:
icacls "%WINDIR%\WinSxS" /grant "%USERDOMAIN%\%USERNAME%":(F) /t - You can now compress files in the WinSxS directory using the compact command. Because some of the files can be used by Windows, you need to specify the
/ioption. Otherwise, compression will stop at the first locked file (in Windows 10, you can use more advanced LZX compression):
compact /s:"%WINDIR%\WinSxS" /c /a /i *

- Restore the owner of the WinSxS directory back to TrustedInstaller:
icacls "%WINDIR%\WinSxS" /setowner "NT SERVICE\TrustedInstaller" /t - Restore the original ACLs for the WinSxS folder items using the ACL backup file you created earlier:
icacls "%WINDIR%" /restore "%WINDIR%\WinSxS_NTFS.acl" - Restore the default startup type for the Windows Installer and Windows Module Installer services:
sc config msiserver start= demand
 sc config TrustedInstaller start= demand


Now check the current size of the WinSxS folder:
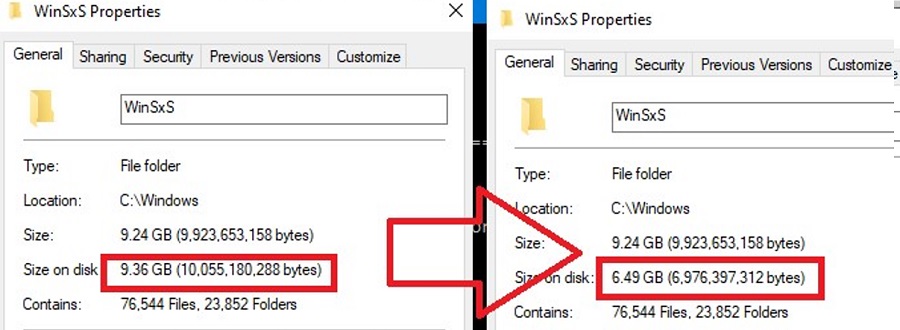
As you can see, in our example the size of the WinSxS folder after the compression has reduced from 9.4GB to 6.5GB (about a third). Not bad, especially for a small-sized SSD-drive.
These commands can either be run separately (then it is much easier to track the results of each of them) or used in a single script file. If you run it, the described compression procedure for items in the WinSxS folder will start. You can download the ready-to-use batch file to enable NTFS compression on WinSxS here: winsxs_ntfs_compress.bat
You can use this script regularly because new uncompressed files will appear in the WinSxS folder after you install new Windows updates or apps.
22 comments
Thank you very much!
I tried your solution, but step 8 “Recover original ACLs to the WinSxS directory” failed with the following messages:
C:\Windows\WinSxS\Manifests\x86_microsoft.vc80.crt_1fc8b3b9a1e18e3b_8.0.50727.42_none_db5f52fb98cb24ad.cat: Access denied.
Successfully Processed 20618 files; Failed to process 1 file.
In fact it failed to process 24000 files because it aborted due to the Access Denied failure.
I tried to re-run the instruction and edited that line so it could pass that phase and it only processed 4 files more and failed again.
Are you able to hint how to proceed from now?
Check current permission on file x86_microsoft.vc80.crt_1fc8b3b9a1e18e3b_8.0.50727.42_none_db5f52fb98cb24ad.cat. Try take ownership of file and grant your account full rights to it. Next repeat step 8 again.
Or manually set the permissions on the file in accordance with the data in the file WinSxS_NTFS.acl
Hi,
It also failed on me with the restoring ‘TrustedInstaller’ part, saying access denied.
I presume this is because the first steps gave my user Ownership, but, we didnt add my user as a user to the actual permissions.
So, when you try to change back to TrustedInstaller, your user doesnt have the access to do that. Atleast that is how I see it.
So, I had to run this instead, to get back to TrustedInstaller Owner:
icacls “%WINDIR%\WinSxS” /grant Rob:(F) /t /c
icacls “%WINDIR%\WinSxS” /setowner “NT SERVICE\TrustedInstaller” /t /c
icacls “%WINDIR%\WinSxS” /remove Rob /t /c
It gives my user ‘Rob’ fullcontrol first, then changes to TrustedInstaller, and then finally removes my user permission for ‘Rob’.
Replace ‘Rob’ with whatever your username is.
It seems that even though you can take ownership and then do things, you dont have permission to change ownership back, unless you give your user ‘Full control’ permissions.
HTHs,
Rob.
Hi, Rob!
Thanks for your comment, but we give current user Full Control permission on step 5, then execute command:
icacls “%WINDIR%\WinSxS” /grant “%USERDOMAIN%\%USERNAME%”:(F) /t
You must just replace %USERDOMAIN%\%USERNAME% on your username
I’m sorry but compressing winSXS seems to increase size on disk? in my case it does 🙁
winSXSfolder shows decrease size on disk, but when I check the drive full size it actually increased.
my mistake, forgot to restart PC now it shows correct size 🙂
Extremely good looking guide. Most be one and only on web to go through this deep analyze of how to go further in data usage.
Honestly, since Microsoft is being a brick while operating systems with full support should take less than 500MB in size while online and then consider what people actually wants to use in os the whole idea of increasing size to raise hardware market supported by all new hardware manufacturers is good for marketing, but there should be some system ripped to WinPE level where only thing that should take space is few KB driver base for all devices, but since now days a simply 500KB audio driver can turn to 250MB totally idiotic bloatware it’s hilarious really. Sadly this is possible at linux side, but Microsoft sure is enjoying the install size being around 20-30GB in full with only barebone components in the machines.
To solve the “sc config msiserver start= demand” Access is denied, use NSudo and run the same command again:
sc config msiserver start= demand
Nice one Woshub.com, simply lifting the WinSXS compressing part from my blog and not giving any credit! http://dandar3.blogspot.com/2013/01/how-to-ntfs-compress-windows-winsxs.html
Does this work with windows server 2008 sp2?
KB2852386 is for Server 2008 R2. Is not applicable to Server 2008 SP2. For Server 2008 SP2, use Compcln.exe.
This is a great guide.
You might want to update and mention that current versions of Windows 10 automatically clean up the WinSXS folder – and note which things you mention are not a part of the automatic cleanup.
As Microsoft states from their cleanup Doc…
“Windows 10 and Windows Server 2016 automatically reduce the size of the WinSxS folder by using methods similar to the ones described in this topic, in addition to internal processes, such as uninstalling and deleting packages with components that have been replaced by other components with newer versions. Previous versions of some components are kept on the system for a period of time, allowing you to rollback if necessary.”
This might help users, so they aren’t taking time to repeat steps that Windows 10 is now doing for them. It might also help with confusion when the size doesn’t change, and to know when they can still rollback items.
Do you talk about a task named StartComponentCleanup (located in the task scheduler section \Microsoft\Windows\Servicing)? This task deletes replacement packages files older than 30 days.
When you issue `compact /s:”%WINDIR%\WinSxS” /c /a /i` instead of `compact /s:”%WINDIR%\WinSxS” /c /a /i *`, the WinSxS directory *itself* will be marked as “compressed”, too. This means any newly created subfolders and files will be compressed right from the start and it’s no longer necessary to run this script periodically.
> icacls “%WINDIR%\WinSxS” /grant “%USERDOMAIN%\%USERNAME%”:(F) /t
Didn’t work for me instead use: icacls “%WINDIR%\WinSxS” /grant User:F /t
[1]https://stackoverflow.com/questions/2928738/how-to-grant-permission-to-users-for-a-directory-using-command-line-in-windows
Very good article. Helped me 100%.
Before 100Mb, after 8Gb.
This should be included script in the Citrix Optimization tool and BASE Image Script Framework for non-persistent virtual desktops. Reduced free space from 3.42GB to 6.47GB saving limited server SSD intellicache for our six servers. Great work, Thank you.
On the web you can find in another script that allows to reduce the size of the WinSxS folder — WinSxSLite (by Christian Bering Boegh). According to the developer, this script searches the latest version on dll files in WinSxS, makes symbolic links to them from all previous versions and removes the old file versions. It is no recommended to use WinSxSLite, because in spite of the idea being good, the result of running the script is unpredictable, and though the WinSxS folder size is reduced, some Windows components can be damaged
Hi!
I made a deeply cleanup from Windows 10, and now, I cant install Windows Media Player, is not the files to enable via powershell this feature.
It’s possible to reinstall Features and apps deleted in Winsxs and made possible reinstall it?
Thanks
Great!!! Really helpful!