Information security best practices require the computer screen to be locked when the user is inactive (idle) for a period of time. A Windows user can lock the computer screen themselves (using the Win + L)keyboard shortcut). However, it is better to implement a Group Policy that automatically locks the screen on Windows computers when they are idle and apply it to all machines (users) in the AD domain.
Configuring Lock Screen Settings in Windows Using Group Policy
You can enable a computer security policy that requires users to re-authenticate (enter a password) after a specified period of inactivity.
Let’s create and configure a domain Group Policy to manage screen lock options:
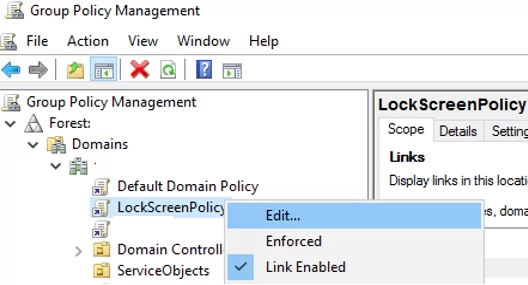
- Open the Group Policy Management console (
gpmc.msc), create a new GPO object (LockScreenPolicy) and link it to the domain root (or to the OU that contains the computers on which you want to implement the lock screen policy);
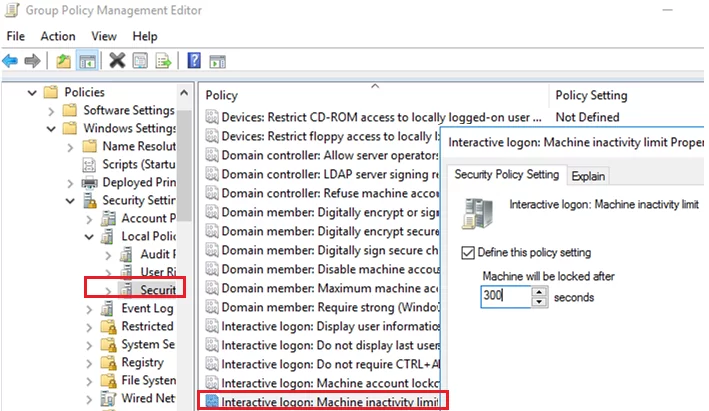
- Go to Computer Configuration -> Policies-> Windows Settings -> Security Settings -> Local Policies -> Security Options;
- Specify the number of seconds of inactivity to lock the desktop in the Interactive logon: Machine inactivity limit option. For example, to lock the computer after 5 minutes set this to
300;
- To apply new Group Policy settings, restart the computers. Now your computers will lock automatically when no activity is detected.
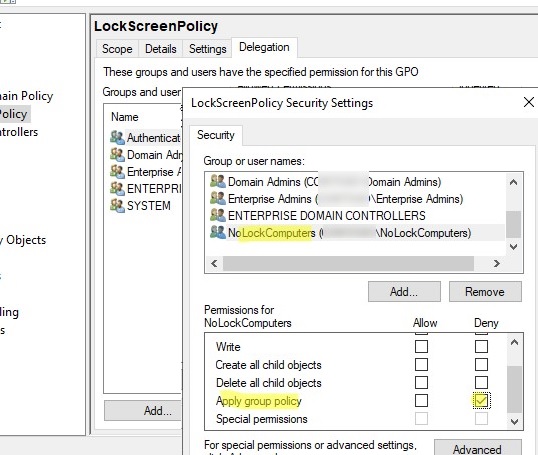
GPO Security Filtering allows you to specify computers where the screen lock policy should not apply.
- Create a NoLockComputers security group in AD and add computer accounts that should not lock their screens;
- From the GPMC console, select your policy, select the Delegation tab, and click Advanced;
- Add the security group you created and set it to Deny in the Apply group policy permission;

- Now the screens of the computers in this group will not be locked automatically.
Enable Password Protected Screensaver to Lock Computer via GPO
You can also implement an automatic screen lock policy using Windows screen saver settings. This policy can be applied to users, rather than to computers.
- Create a GPO and link it to the OU with user accounts;
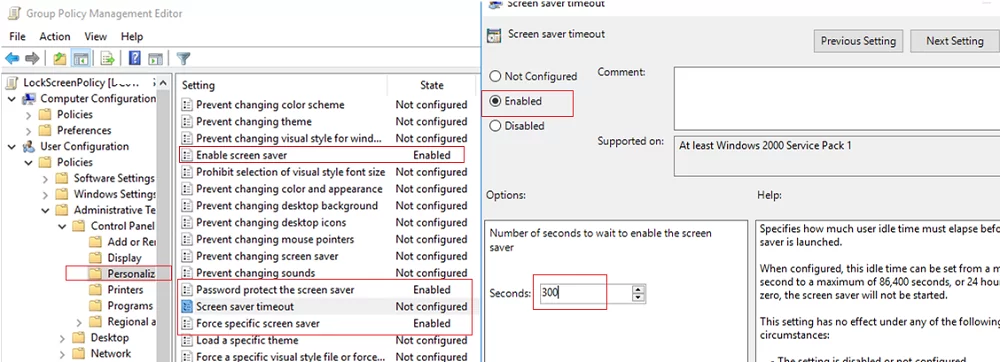
- Edit the policy and go to User Configuration -> Policies -> Administrative Templates -> Control Panel -> Personalization;
- There are several options to manage your screen saver and screen lock settings in this GPO section:
- Enable screen saver
- Password protect the screen saver — require a password to unlock a computer;
- Screen saver timeout – set the period of inactivity (in seconds) before the screen saver is activated and the computer is locked. Set this to 300 to lock the screen automatically after 5 minutes;
- Force specific screen saver – you may specify a screen saver file. Most often it is
scrnsave.scr(Learn more about how to configure screensavers with GPO); - Prevent changing screen saver – prevents users from changing screen saver settings.
- Wait for the Group Policy settings to be updated on the clients, or update them manually by using the command
gpupdate /force. - After the GPO is applied, the screen saver and screen lock settings are protected from being disabled from the Windows interface, and user sessions will be locked after 5 minutes of inactivity. Computer screen lock settings apply to both user console sessions and RDP sessions on RDS hosts.
To unlock the computer, the user must press Ctrl+Alt+End, click the screen, or press any key (depending on the Windows client version), and enter the password.
If you need to configure different screen lock settings for different user groups, you can use the GPO Security Filtering (as above) or deploy lock screen settings through the registry. For example, office workers should lock their screens after 10 minutes of inactivity, and production or SCADA operators should never be locked.
The settings for the lock screen that are discussed above correspond to the following registry parameters in the HKEY_CURRENT_USER\Software\Policies\Microsoft\Windows\Control Panel\Desktop:
- Password protect the screen saver is a REG_SZ parameter with the name ScreenSaverIsSecure = 1
- Screen saver timeout is a REG_SZ parameter with the name ScreenSaveTimeout = 300
- Force specific screen saver is a REG_SZ parameter with the name ScreenSaveActive = 1 and SCRNSAVE.EXE = scrnsave.scr
You can use the GPO to set the registry parameter values to different user groups.
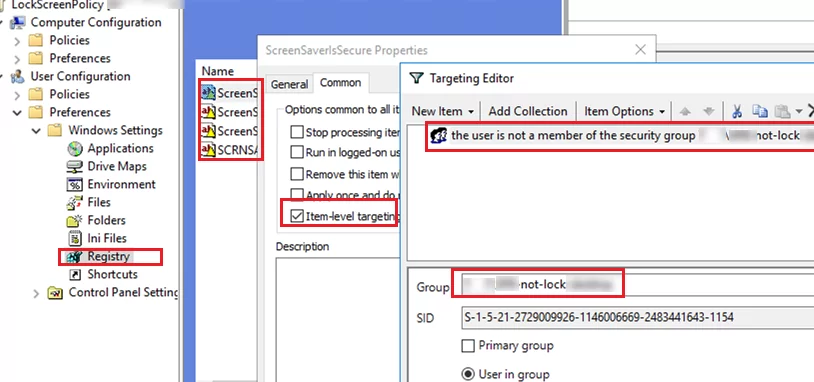
Create a domain security group (grp_not-lock-prod) for which you want to disable the screen lock policy and add users to it. Create the registry parameters described in the GPO section User Configuration -> Preferences -> Windows Settings -> Registry. Use Item Level Targeting for each registry parameter to specify that the policy should not apply to a specific security group (the user is not a member of the security group grp_not-lock-prod).
1 comment
Starting with Windows Server 2012 and Windows 8, Windows detects user-input inactivity of a sign-in (logon) session by using the security policy setting Interactive logon: Machine inactivity limit