In each new ESXi release, VMware updates the version of the virtual machine and the virtual hardware. In new versions of the VMware VMs, new functionality appears, new virtual devices are added, resource limits increased (PCI slots, RAM, vCPU), bugs are fixed, etc. So when migrating to a newer ESXi version it is desirable to upgrade the virtual hardware version on all virtual machines. It’s better to use older VM versions only for compatibility purposes. In this article, we’ll look at how to upgrade the virtual hardware version of a VM running on a VMWare ESXi host.
The compatibility of ESXi and VM hardware versions is shown in the table below.
| Hypervisor Version | VM Version |
| ESX/ESXi 4.X | 7 |
| ESXi 5.0 | 8 |
| ESXi 5.1 | 9 |
| ESXi 5.5 | 10 |
| ESXi 6.0 | 11 |
| ESXi 6.5 | 13 |
| ESXi 6.7 | 14 |
| ESXi 6.7 U2 | 15 |
| ESXi 7.0 (7.0.0) | 17 |
| ESXi 7.0 U1 (7.0.1) | 18 |
| ESXi 7.0 U2 (7.0.2) | 19 |
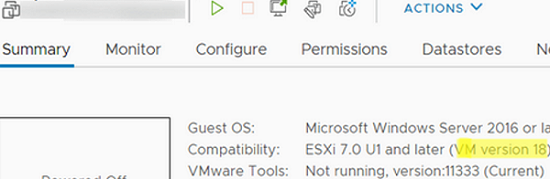
You can check the current virtual machine (virtual hardware) version on the Summary tab of the virtual machine in the Compatibility section. The screenshot below shows that VM version 18 (ESXI 7.0 U1 and later) is used.
You won’t be able to run a VM on an ESXi host that doesn’t support the new version of the VM hardware. When trying to migrate such a VM to a host with an old version of ESXi using VMotion, an error will appear:
The virtual machine version is not compatible with the version of the host munexi1.

Before upgrading the VM version, it is recommended to:
- Create a VM snapshot
- Update VMware Tools. If you upgrade VM Hardware prior to installing the latest VMware Tools version, the network settings can be reset in the Windows guest virtual machine.
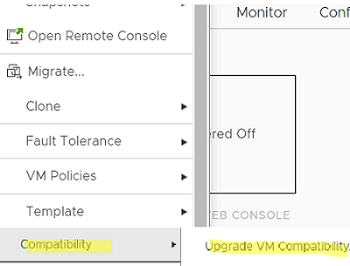
To upgrade the Virtual Hardware version, the virtual machine has to be stopped. After that right-click the VM and select Compatibility -> Upgrade VM Compatibility.
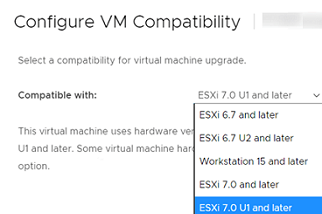
Confirm the virtual hardware update and select the VM hardware version. In this example, I have selected the latest ESXi 7.0 U1 and later available on my host.
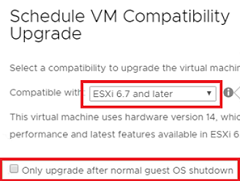
You can schedule an automatic upgrade of the virtual machine hardware version the next time the VM is gracefully restarted.
- Select Compatibility -> Schedule VM Compatibility Upgrade in the VM context menu;
- From the Compatible with drop-down list, select the version of VM hardware version you want to upgrade to;
- Enable the option Only upgrade after normal guest OS shutdown;

- The virtual hardware version of the virtual machine will be updated the next time the virtual machine is rebooted.
You can also update the VM Hardware version using PowerShell cmdlets from the VMware PowerCLI module. Connect to your vCenter or ESXi host:
Connect-VIServer esxi_hostname
List the virtual hardware versions of your virtual machines:
Get-VM | select Name, hardwareversion, PowerState
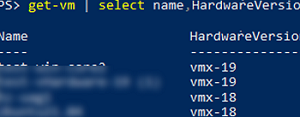
WARNING: The 'Version' property of VirtualMachine type is deprecated. Use the 'HardwareVersion' property instead.
To update the VM hardware version using PoweShell, run the command:
Set-VM -VM lon-fs03 -HardwareVersion vmx-19 -Confirm:$false
If the specified VM hardware version is not supported by the ESXi host, an error will appear:
The operation for the entity mytestVM1 failed with the following message: The operation is not supported on the object.
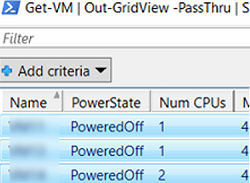
You can list the VMs that need to be upgraded using the Out-GridView cmdlet:
Get-VM |Where-object {$_.powerstate -eq "poweredoff"} | Out-GridView -PassThru | Set-VM -HardwareVersion vmx-19 -Confirm:$false
You will see a graphic table in which you need to select the VMs you want to upgrade (use the CTRL key to select multiple VMs).
You can schedule automatic hardware upgrades on all VMs on a host with a simple PowerShell script:
$AllVMs = Get-VM
 Foreach ($VM in ($AllVMs)) {
 $VMConfig = Get-View -VIObject $VM.Name
 $vmConfigSpec = New-Object VMware.Vim.VirtualMachineConfigSpec
 $vmConfigSpec.ScheduledHardwareUpgradeInfo = New-Object -TypeName VMware.Vim.ScheduledHardwareUpgradeInfo
 $vmConfigSpec.ScheduledHardwareUpgradeInfo.UpgradePolicy = “always”
 $vmConfigSpec.ScheduledHardwareUpgradeInfo.VersionKey = “vmx-19”
 $VMConfig.ReconfigVM($vmConfigSpec)
 }
All virtual machines will be automatically upgraded to the specified VM hardware version on the next reboot.
If you are using a free ESXi version (VMware vSphere Hypervisor), you won’t be able to the VM hardware version through PowerCLI due to API restrictions. But you can use the vim-cmd command in the ESXi shell:
Get the list of VMs on the server:
vim-cmd vmsvc/getallvms
Find the VMID of the VM you want to upgrade and specify it in the following command:
vim-cmd vmsvc/upgrade vmid vmx-17
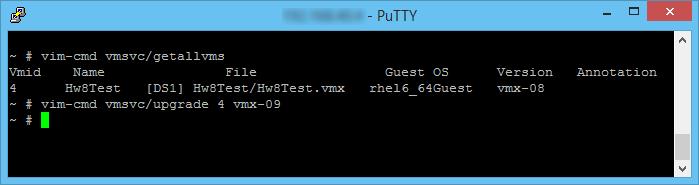
Start VM and make sure that it has been upgraded to VM version 17.
There is also another, unsupported version of updating the VM hardware version by directly editing the VM configuration file (VMX).
Connect to the ESXi host via SSH and go to the directory with the VM:
cd /vmfs/volumes/datastore_name/test_vm
Edit the test_vm.vmx file:
vi myvm.vmx
Find the config line:
virtualHW.version = "12"
And change to:
virtualHW.version = "17"
Save and close the VMX file ( Esc, :, w, q ).